💡 This guide is inspired in the tutorial de youtube made by 402 Payment Required. I recommend taking a look to his guide and the other videos he has.
When we talk about self-custody, we often talk about risk minimization. There are many different types of risks, ranging from the risk of funds being stolen to the risk of funds being lost by the user themselves, as well as risks associated with creating backups, among others.
Within the ecosystem, everyone is familiar with the phrase “don’t trust, verify”. However, in practice, most users do not verify; instead, they trust that the tools they use have already been verified by people they usually do not know personally but who have, or are assumed to have, a certain level of experience and reputation. Nevertheless, this is not always the case, as demonstrated by the recent Coldcard incident. A bug in the code of one of the most reputable hardware wallets in the ecosystem allowed malicious actors to steal the funds of users who had followed almost all of the security best practices that are commonly recommended.
While it is true that Coldcard’s code was publicly available and could be audited (Source Available), the absence of a bug bounty program or the fact that it was not fully open source likely contributed to this bug remaining undetected. We can understand the Source Available as a license that allows malicious actors to study the code looking for vulnerabilities, but at the same time as a license that disincentivize honest actors to review and audit the code as they cannot actually use it.
So, what can a user do if they do not understand the code and therefore cannot verify it, but, as we have seen, also cannot blindly trust that the software they use is correct and free of bugs?
There are three main options:
- For each piece of software you use, identify which option best meets your requirements while also being the most open and having the largest developer community. This reduces the risk of a bug like the one found in Coldcard going unnoticed.
- Do not put all your eggs in one basket when using critical softwares. For example, in the case of hardware wallets, instead of using a single-signature wallet secured by one hardware wallet model, create a multisignature wallet where each signature is managed by a different hardware wallet model. If one hardware wallet contains a bug like the one found in Coldcard, the funds will remain protected by the other wallets.
- Unlike the second approach, another option is to put all your eggs in a single basket. In this case, the idea is to do everything using a single software solution that you trust the most.
In this article, we will focus on the third option and define an environment for using Bitcoin with a hardware wallet, or at the very least, with an air-gapped device.
Bitcoin Core as a unique Bitcoin related software
Typically, the most common setups used by Bitcoiners consist of a node, an Electrum server, a hot wallet (serving as a watch-only wallet), and a hardware wallet. Naturally, there can be variations to this setup, such as omitting the Electrum server or the node, among others.
In the setup described above, users depend on four different software applications. This means there are four separate trust points and four critical points where having a bug could be catastrophic.
The main goal of this post is to explain how these risks—and the associated trust assumptions—can be reduced to a single software application. Specifically, the objective is to use the same software for the node, the watch-only wallet, and the air-gapped wallet.
Since the chosen software should also be well audited and widely reviewed in order to minimize the risk of critical bugs, the selected software is Bitcoin Core.
In the following sections, we will explain how to set up an environment consisting of a running Bitcoin Core node and a completely isolated Bitcoin Core wallet that will serve as a replacement for a hardware wallet.
The requirements are:
- One computer connected to the Internet.
- One computer that will be used exclusively for signing transactions. It must not be used for any other purpose and must never be connected to the Internet again.
- Three brand-new USB drives or microSD cards.
Computer requirements
The guide does not specify what are the computers requirements. The requirements to run Bitcoin Core are minimum and can be run with almost any computer with a bunch of disk space (~15GB).
The security requirements depend on the paranoia level of each user. Obviously for an air-gapped computer it would be interesting to be able to cut the Internet connection at a phisical level, for example breaking or disconnecting the wifi antena.
⚠️ WARNING!
For a truly air-gapped device, the wifi and bluetooth antenas must be broken or disabled in some way, most of those chips run closed source software and we cannot really know what is going on there. Breaking or disabling it at a hardware level is the only way to be sure the device is truly air-gapped.
There can be other worries such as, can I trust my BIOS? Can I trust my processor? Among others. All these topics have a solution and there are alternatives for almost everything, but all these things are out of the scope of this guide and I recommend that, if these topics interest or worry you, do research about them.
💡 If anyone is interested in buying a computer with some privacy and security requirements, take a look to the SilkPad webpage made by ChavoTheDruid. I recommend that you ask him any question regarding this topic instead of me, as he has much more knowladge and experience in it.
Guide to using Bitcoin Core as the only Bitcoin-related software while maintaining an air-gapped setup
⚠️ WARNING!
Although the resulting setup is fairly secure, its practicality depends on the user’s level of knowledge. I would not recommend this setup for users who do not have at least a basic understanding of security and computing. While it minimizes certain risks, it introduces others—in this case, the risk of human error.
The entire process described in detail below can be summarized in six simple steps:
- Install Tails on a brand-new USB drive and boot the operating system on the computer isolated from the Internet.
- On the Internet-connected computer, download Bitcoin Core and copy it to one of the new USB drives.
- Using the program copied to the USB drive, install Bitcoin Core on the Internet-isolated computer and create a new wallet containing the private keys.
- Export the wallet’s public descriptors and copy them to another of the brand-new USB drives.
- On the Internet-connected computer, install Bitcoin Core, synchronize the node, and import the public descriptors.
- When creating transactions, generate PSBTs on the Internet-connected computer and sign them on the offline computer. PSBTs can be transferred using brand-new USB drives or microSD cards, or by using QR codes.
💡 Previous note: the functionality used in step 4 and 5 is not yet available in the last Bitcoin Core version (v31), it is likelly to be available in version v32. The process can still be done, but with a few tweaks in the process. I recommend checking the part 4 of 402 Payment Required’s youtube tutorial.
⚠️ WARNING!
During the whole process multiple USBs are connected to the air-gapped computer, it is important that they get destroyed once they have been used. If they are not destroyed, some malware could try to copy the wallet file and private keys to it and try to expose that information. The air-gapped principle should NEVER be violated!!
Step 1. Install Tails on a brand-new USB drive
If you already know how to install the Tails image onto a USB drive, you can skip to the next step.
The first step is to download the Tails image from the official website. Along with the .img file, you should ideally also download the corresponding PGP signatures and public keys, which are available on the same website.
Once everything has been downloaded, you should verify that the .img file is authentic. This is done by verifying the signatures. If you are comfortable using the command line, you can use the following command:
gpg --verify tails-xxx-x.x.img.sig

If you prefere to not use the command line, you can use any graphic interface for it. For example Sparrow has a tool to verify PGP signatures.
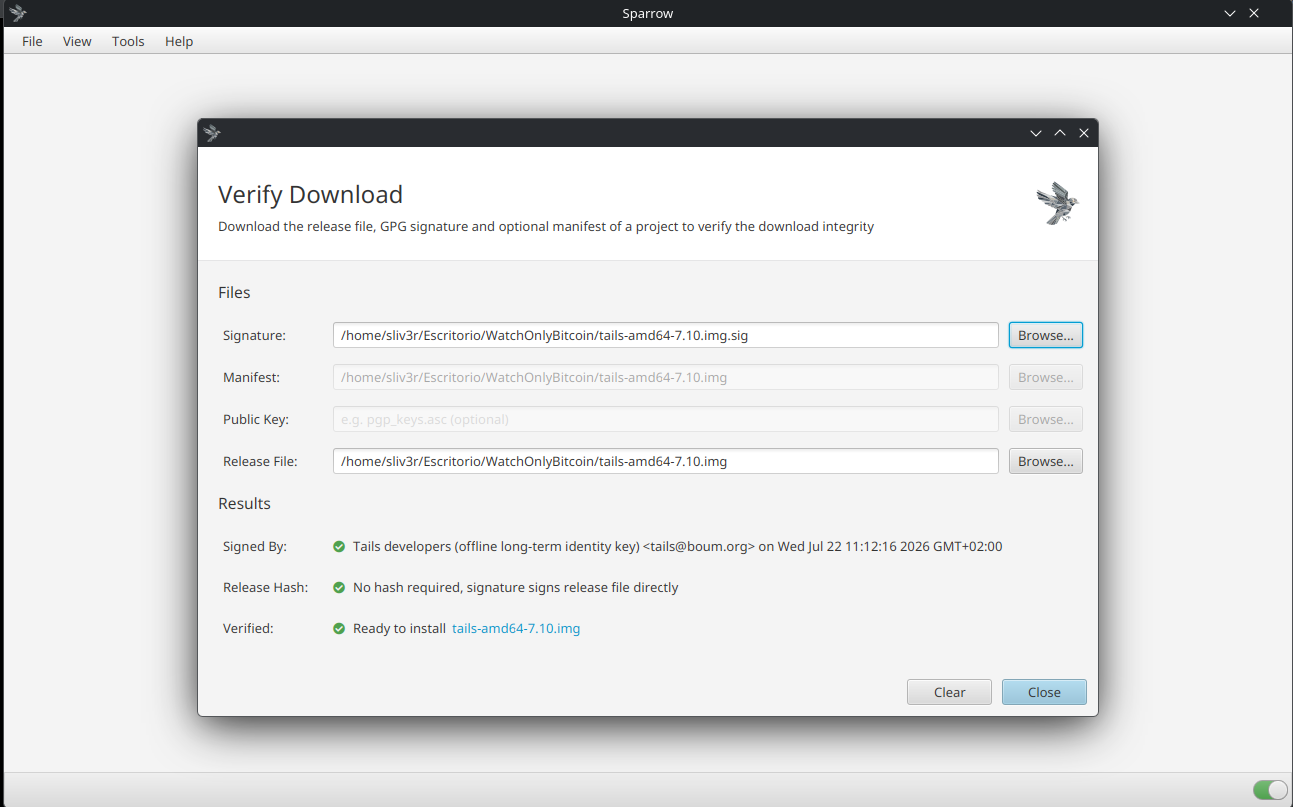
Once you have verified that the signatures are valid, you can proceed to write the image to a USB drive. To do so, you will need to use a program that allows you to flash disk images. In my case, since I use a KDE environment, it comes with a suitable application by default, but there are many alternatives available online.
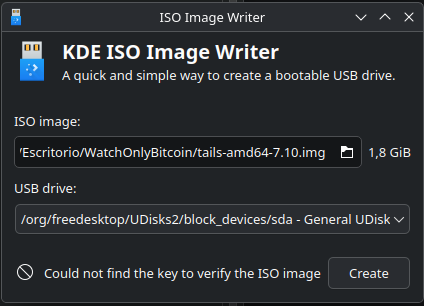
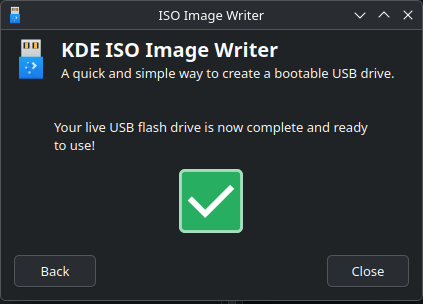
Once the USB drive has been prepared with the Tails image, connect it to the computer that will remain disconnected from the Internet and will act as the “hardware wallet.”
Boot the computer and, from the BIOS or boot menu, select the USB drive as the boot device instead of the internal disk. The exact procedure depends on the computer, so it will not be covered in the guide.
If everything goes as expected, you should see a screen similar to the following:
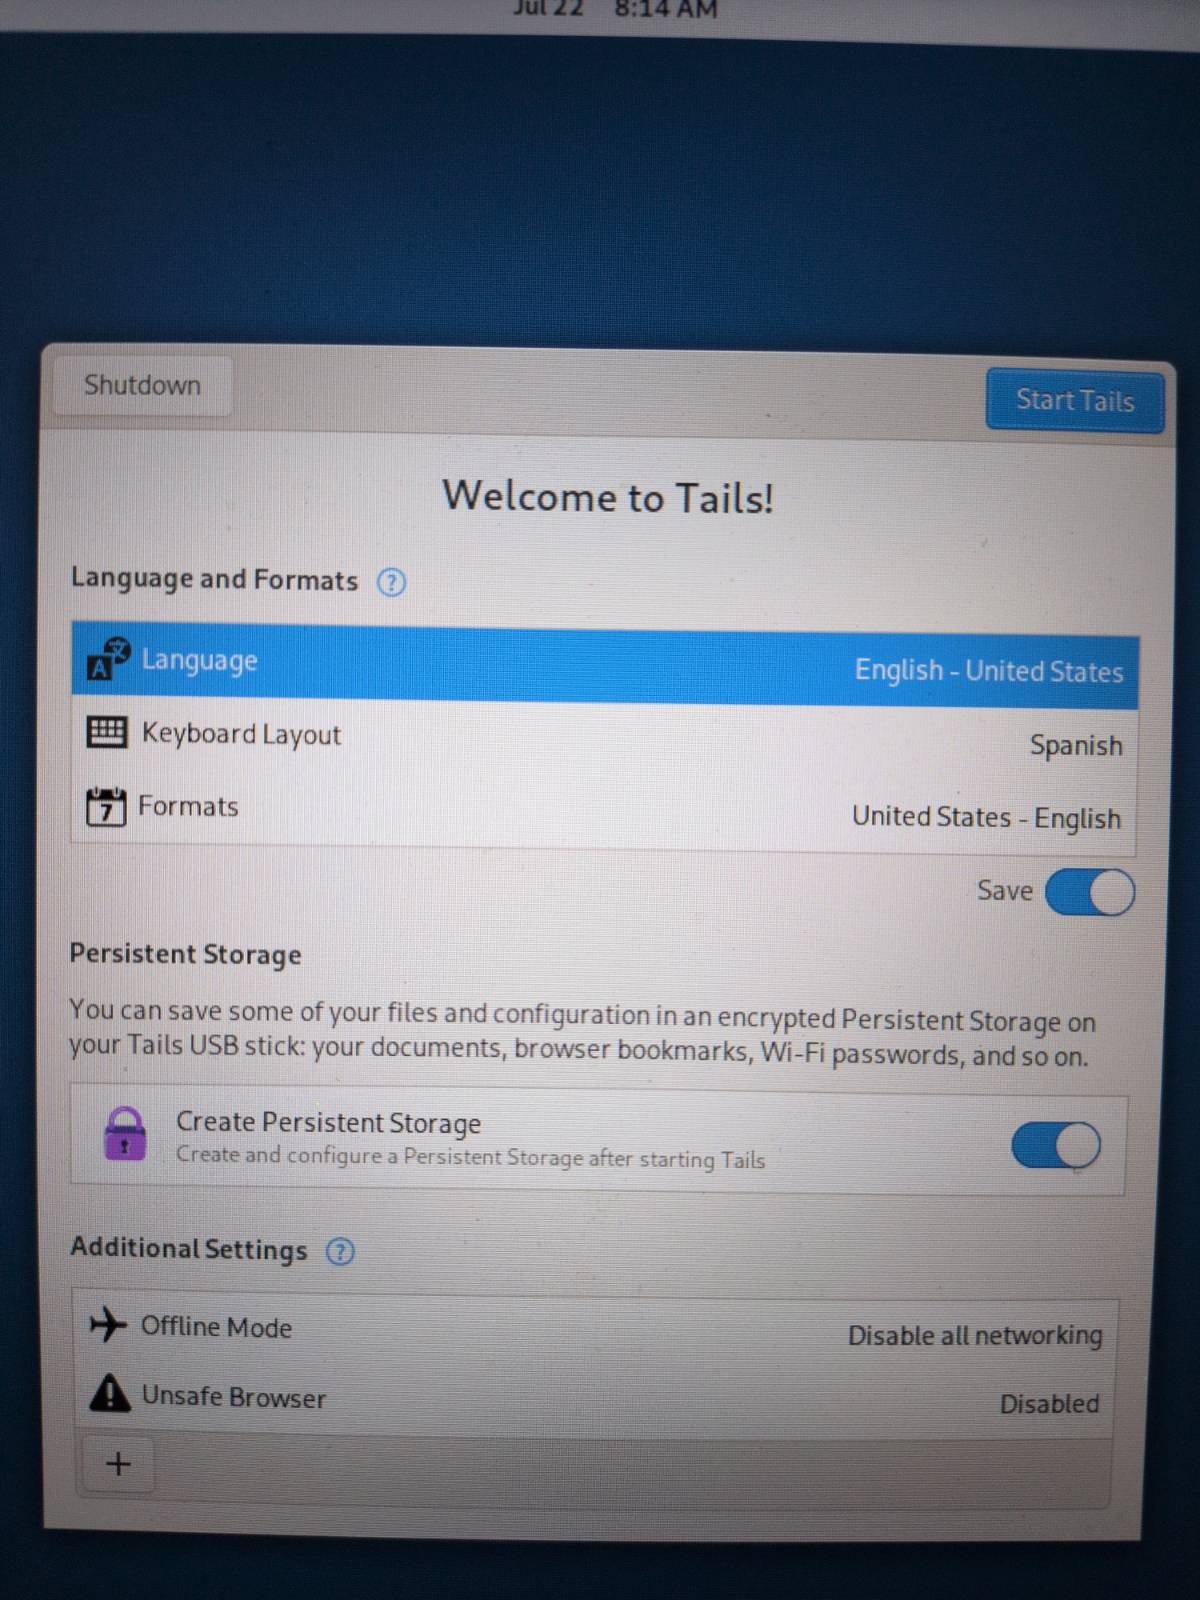
It is important to select the “Create Persistent Storage” option and, under “Additional Settings”, enable the Offline Mode and disable the web browser. The goal is to prevent the device from accessing the Internet at the operating system level.
Once you click the “Start Tails” button, you will be prompted to set up the “Persistent Storage”. Tails erases all data every time the computer is shut down.
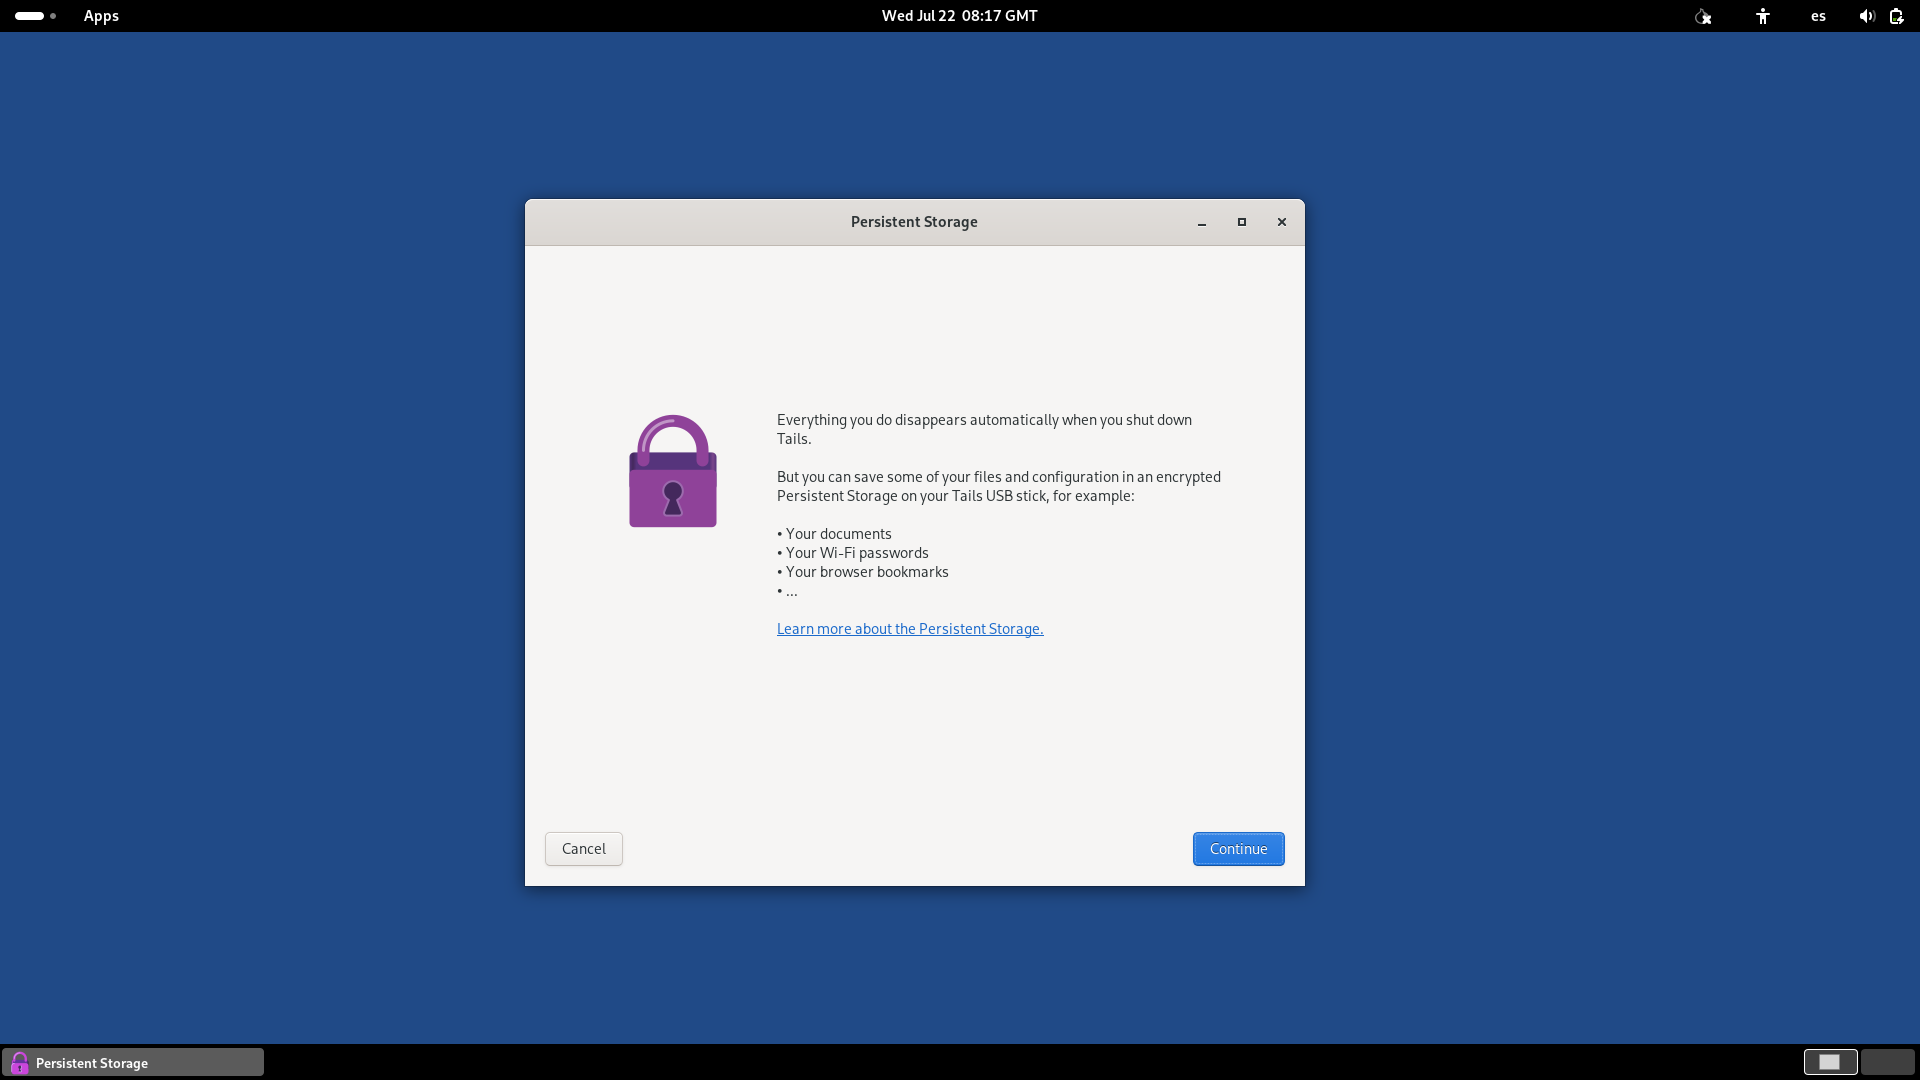
Persistent Storage is an encrypted partition that Tails creates on the USB drive, and it is the only data that persists after the computer is shut down. This is where we will store the Bitcoin Core binary and the wallet’s private keys.
⚠️ WARNING!
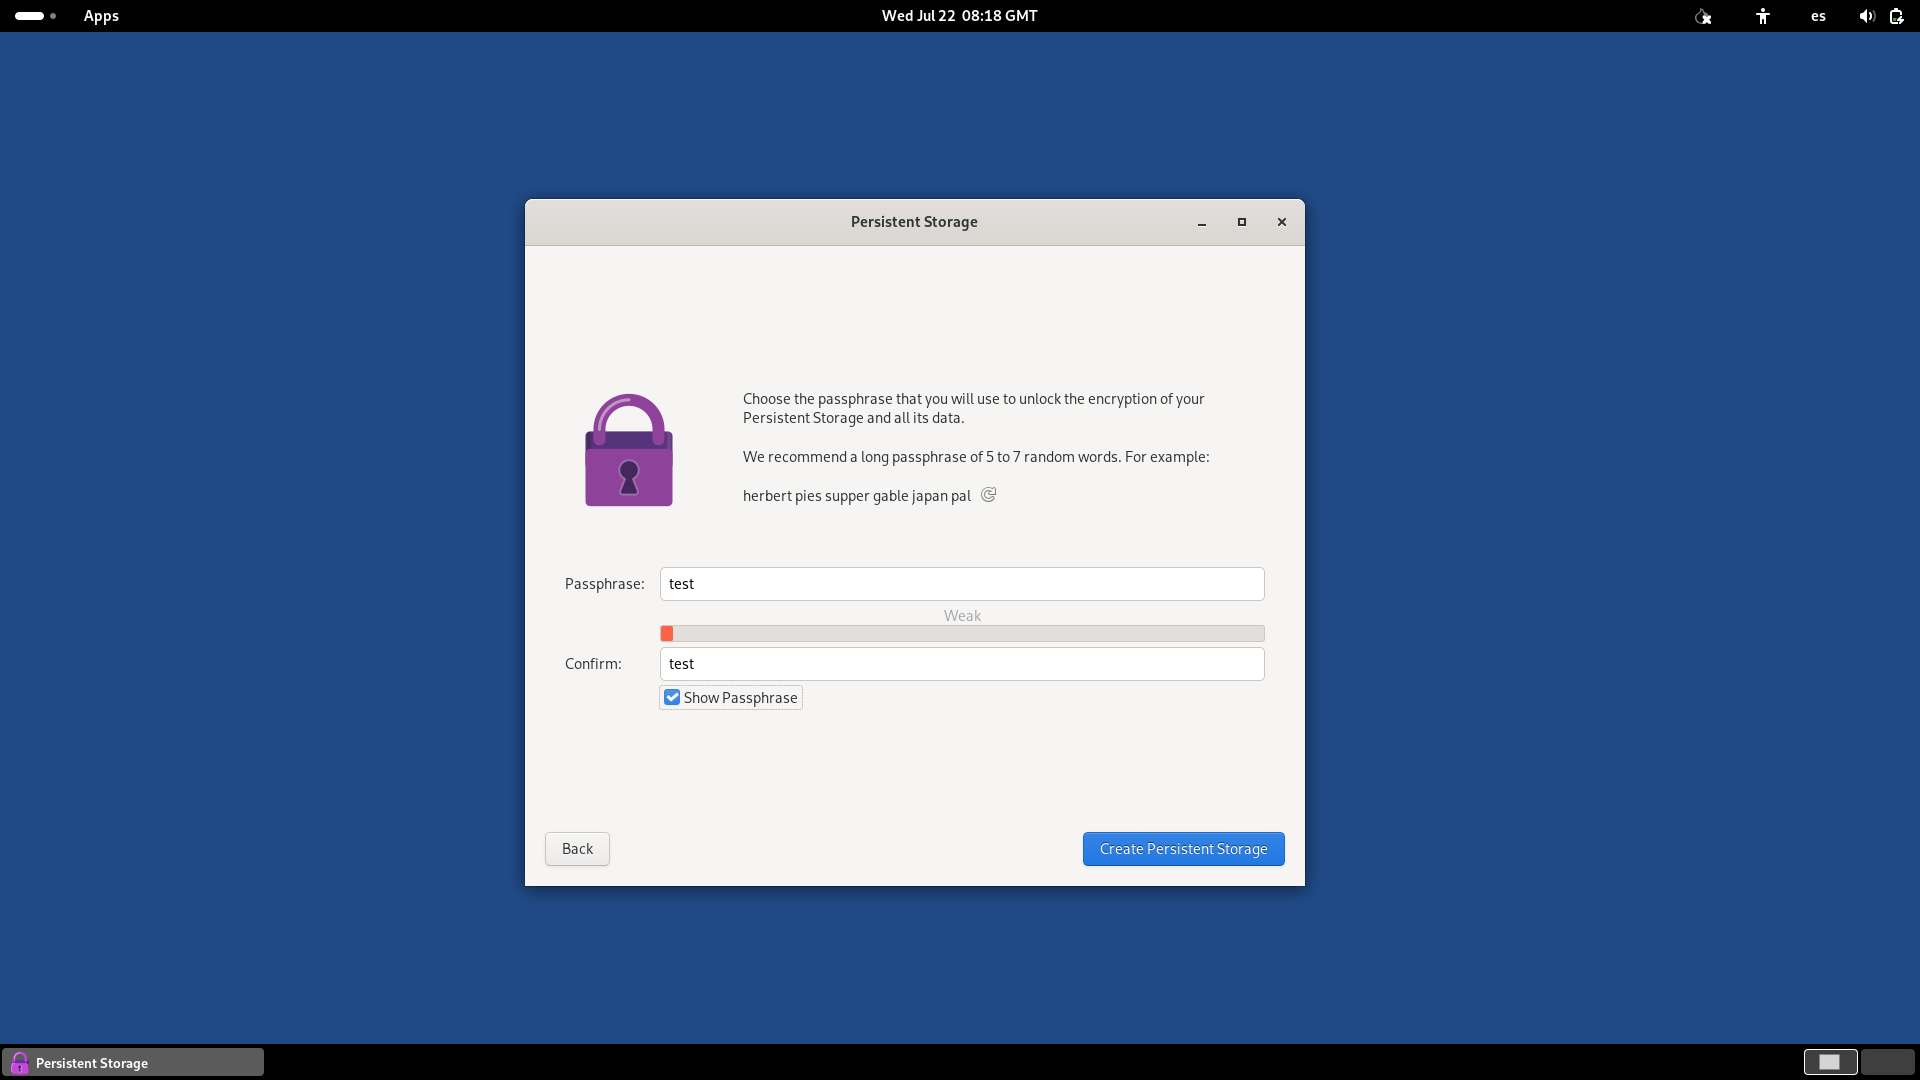
The password requested by Tails is used to encrypt the persistent storage partition. It is important not to forget this password, as the contents cannot be recovered without it. It is also important to choose a sufficiently strong password so that an attacker cannot guess it.
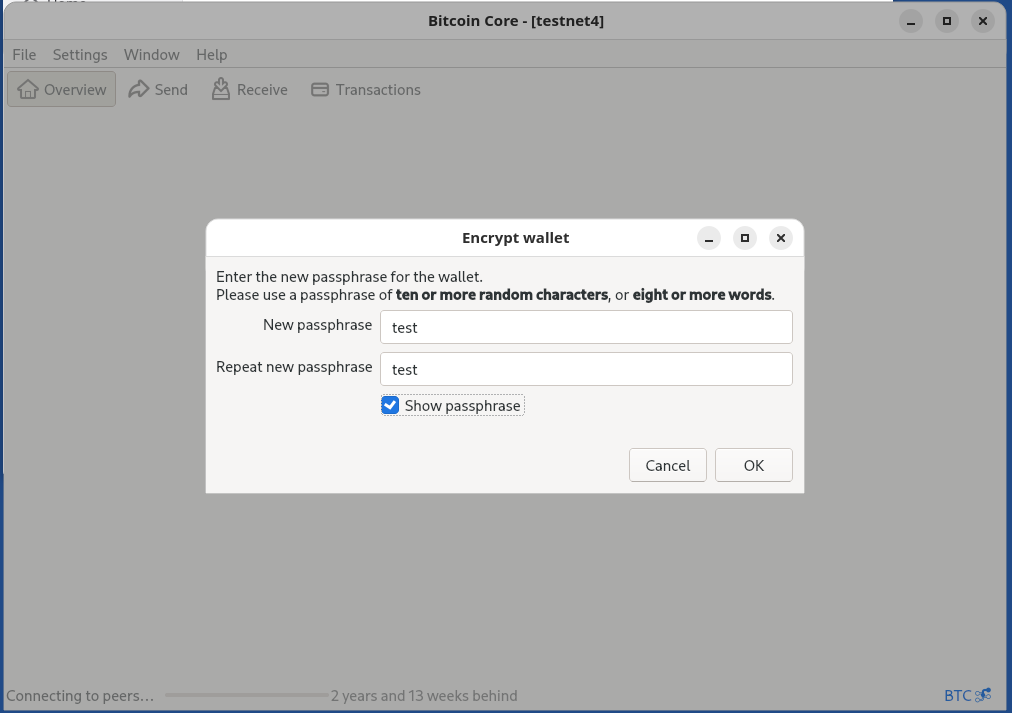
Obviously, “test” is not a good password…
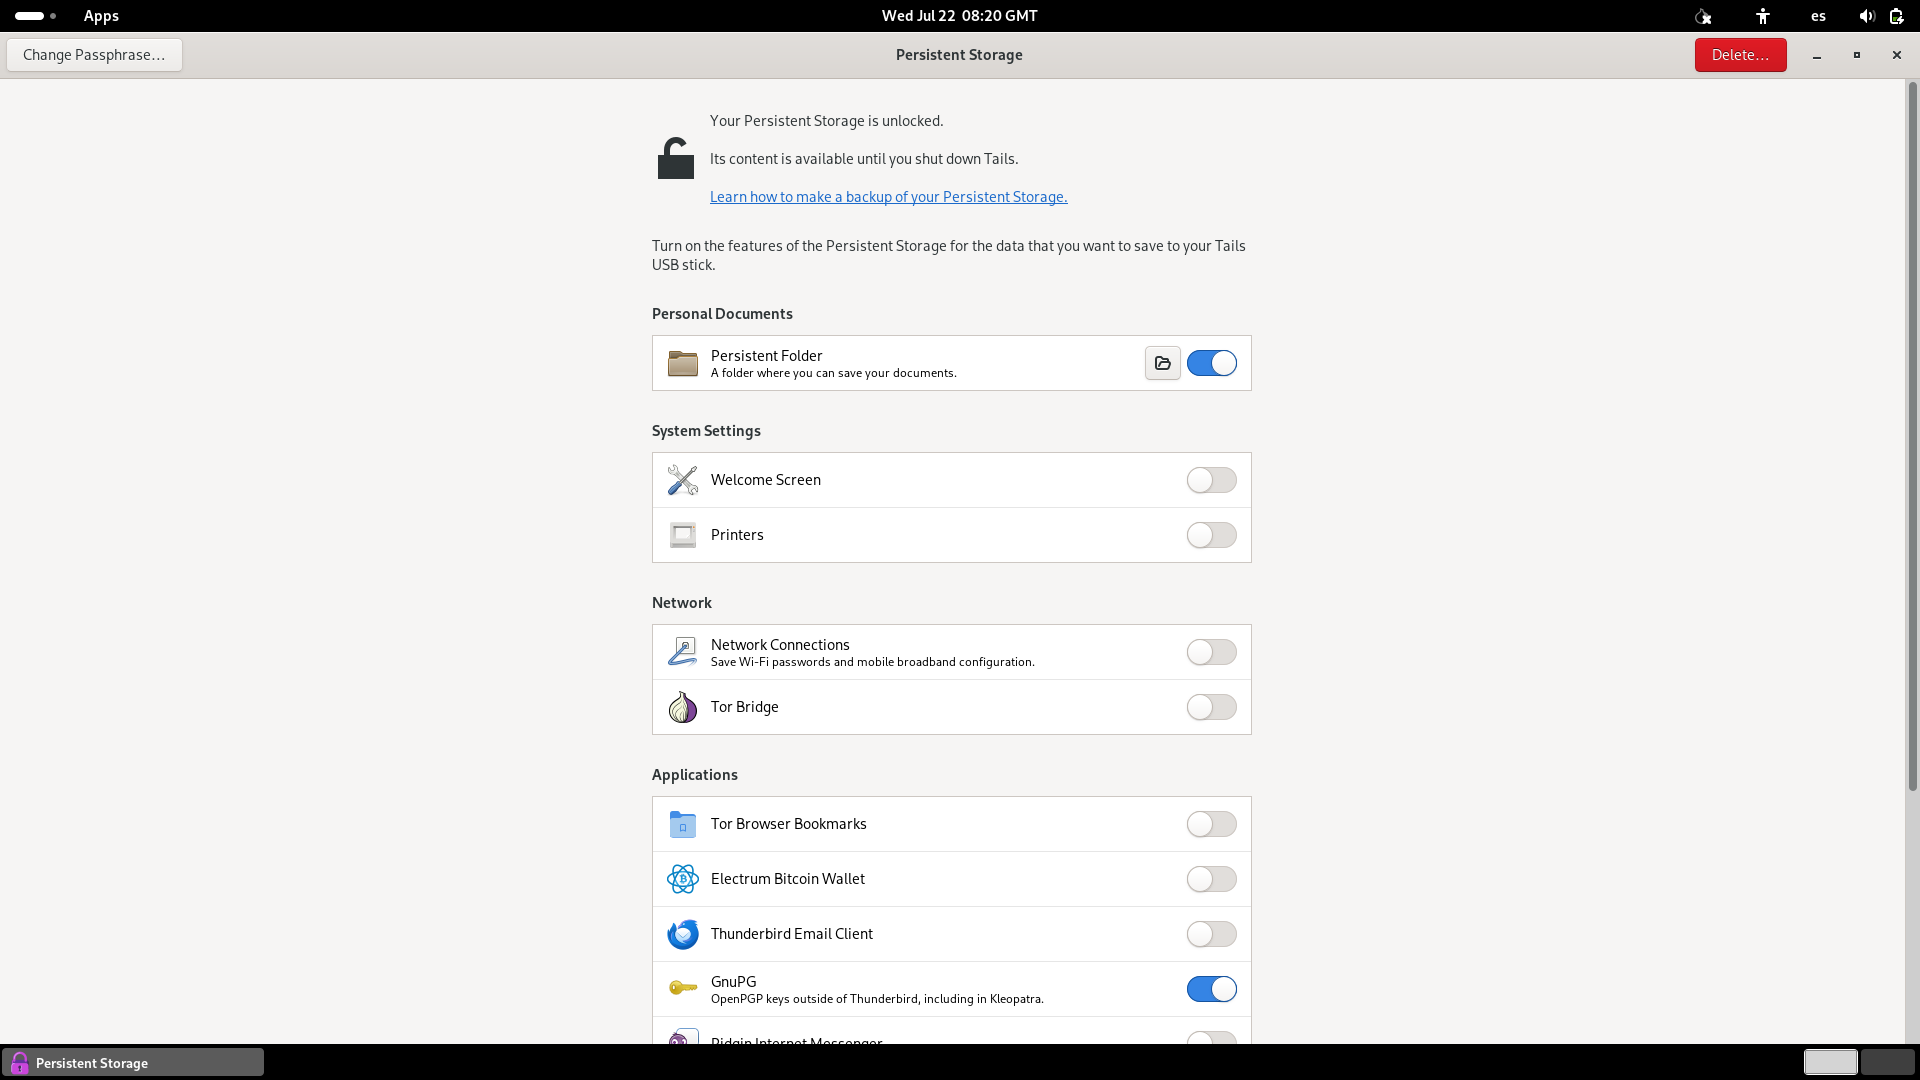
Once the Persistent Storage has been created, Tails will ask what you want to store in it. You should enable the Persistent Folder, as this is where the Bitcoin Core binary and the wallet will be stored.
Additionally, you may enable GnuPG, which allows you to store public keys for verifying binaries. This can be useful if you plan to update the Bitcoin Core binary in the future.
Step 2. Verify Bitcoin Core and transfer it to the offline device
Once we have the air-gapped computer running Tails, we need to install Bitcoin Core on it. To do so, download the binary from the Bitcoin Core website or from the project’s GitHub repository. Along with the binary, download the corresponding signatures and, if you have not already imported them, the public keys of the Bitcoin Core contributors.
💡 The Bitcoin Core contributors keys can be found here: https://github.com/bitcoin-core/guix.sigs/tree/main/builder-keys
The files you should have are:
- The compressed file containing the Bitcoin Core binaries.
- The file containing the hashes of the binaries →
SHA256SUMS - The signature file for SHA256SUMS →
SHA256SUMS.asc - The directory containing the public keys →
guix.sigs/builder-keys
Once these files have been downloaded, the next step is to import the public keys of the signers.
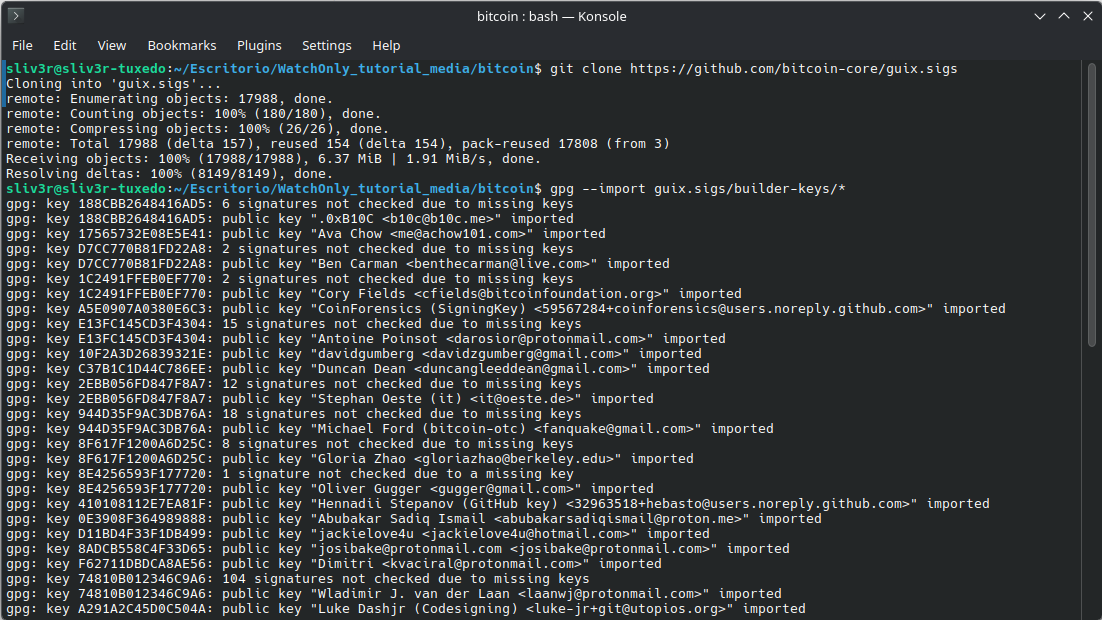
Verify that the hash of the compressed archive matches the hash listed in SHA256SUMS.

Next, verify that the signatures are valid:
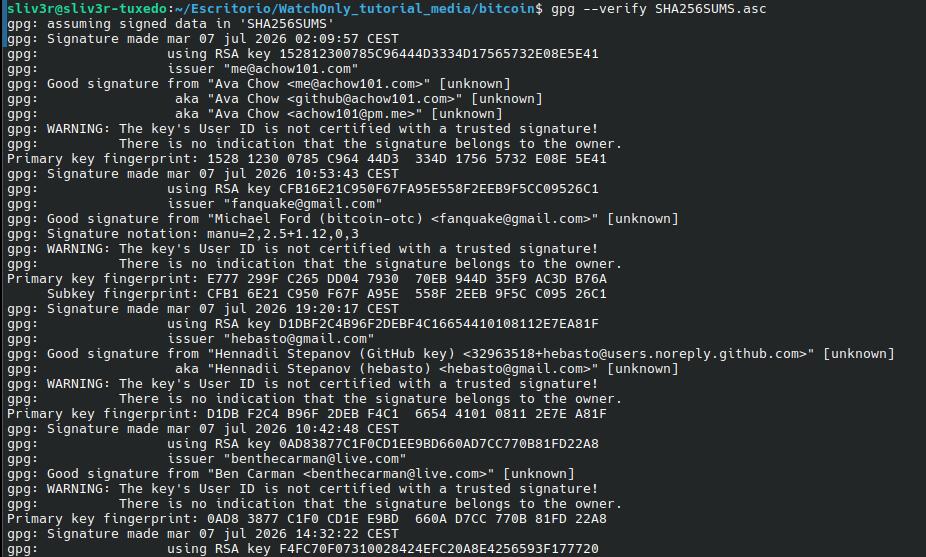
Once you have verified that the signatures are valid, you can extract the files. Inside the extracted directory, the binary of interest is bitcoin-qt, which is the Bitcoin Core binary with the graphical user interface.
This binary will be used on both computers: as the air-gapped wallet on the offline machine and as the watch-only wallet on the Internet-connected machine.
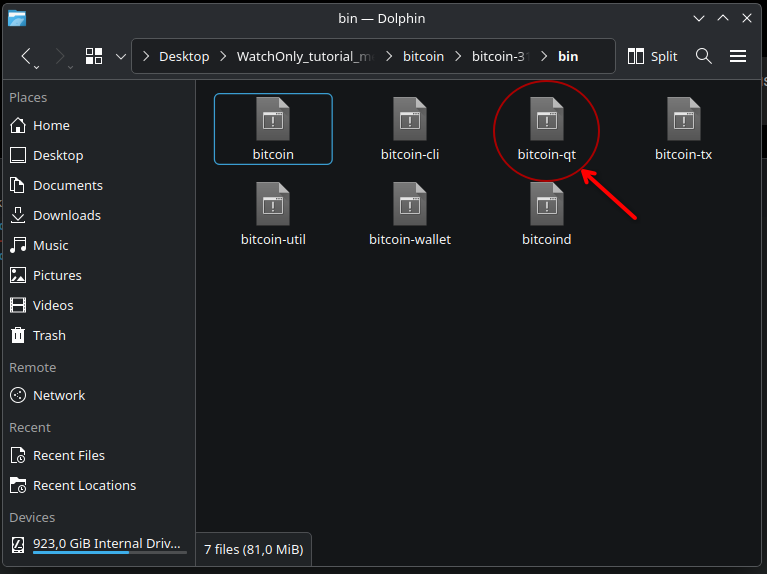
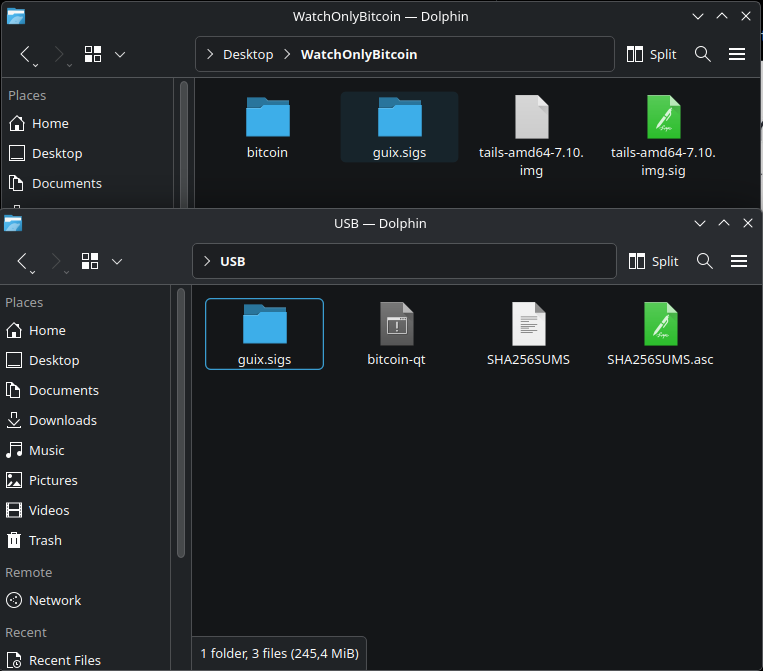
Copy the binary to one of the brand-new USB drives.
💡 As an optional step, you may also want to copy the directory containing the Bitcoin Core developers’ public keys, along with the hash and signature files. This can be useful if you decide to update the binary in the future, as it allows you to verify its authenticity directly from the air-gapped computer using the already imported public keys.
Step 3. Install Bitcoin Core on the Internet-isolated computer and create a new wallet with the private keys
To install Bitcoin Core, copy the bitcoin-qt binary from the USB drive to the air-gapped computer. It should be copied into the Persistent directory and then execute it.
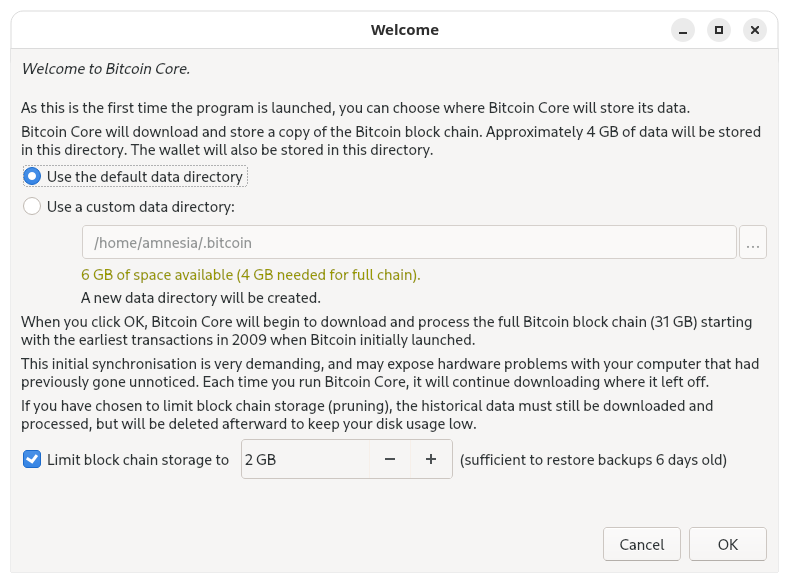
When you launch Bitcoin Core for the first time, it will ask where you want to create the .bitcoin data directory. Select Custom data directory and place the .bitcoin directory inside the Persistent folder so that the wallet and all the required files are preserved across system reboots.
The Block Storage Limit option, which determines how much disk space Bitcoin Core is allowed to use for storing the blockchain, is irrelevant in this setup. Since the computer will always remain disconnected from the network, it will never download the blockchain. For the same reason, every time Bitcoin Core is launched it will display the synchronization progress window, which will always remain at 0.00%. You can simply dismiss it by clicking the Hide button.
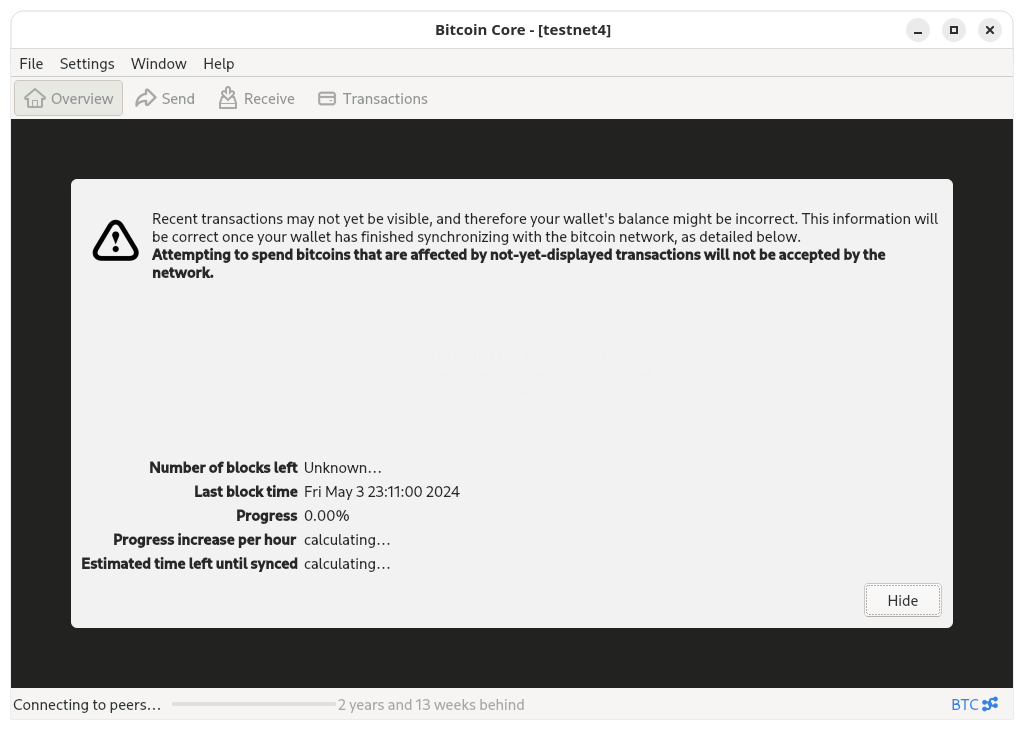
Once this is done, we can create our new wallet. To do it press the File button, top right of the screen, and then Create Wallet.
Choose a name for the wallet and select Encrypt Wallet.
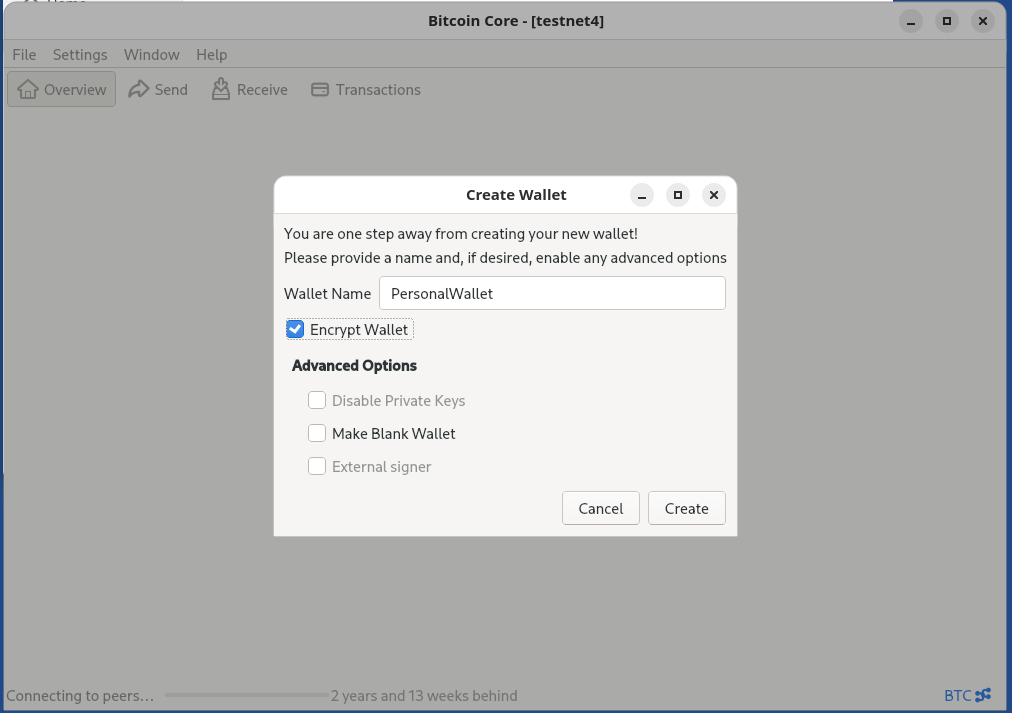
Next, Bitcoin Core will ask you to set a passphrase to encrypt the wallet. Without this passphrase, the wallet file cannot be decrypted, so it is important not to lose it.
⚠️ WARNING!
Anyone who has access to both the wallet file (.dat) and its passphrase will be able to access your funds. It is therefore essential to choose a sufficiently strong passphrase so that it cannot be easily guessed. In this context, the passphrase is used solely to encrypt the wallet file and is unrelated to the passphrase defined in BIP39.
⚠️ WARNING!
It is very important that both thebitcoin-qtbinary and the.datwallet file are stored in thePersistentdirectory. Otherwise, these files will be automatically deleted when the computer is shut down.
Once the wallet has been created, it is advisable to make backup copies of it. To do so, go to File and then select Backup Wallet.
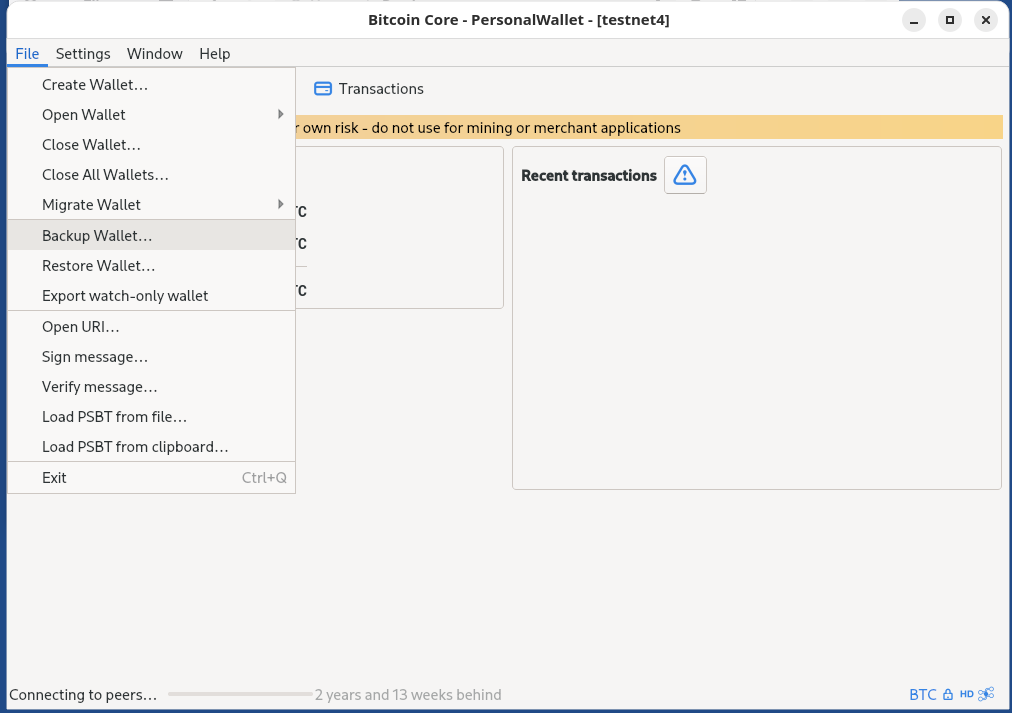
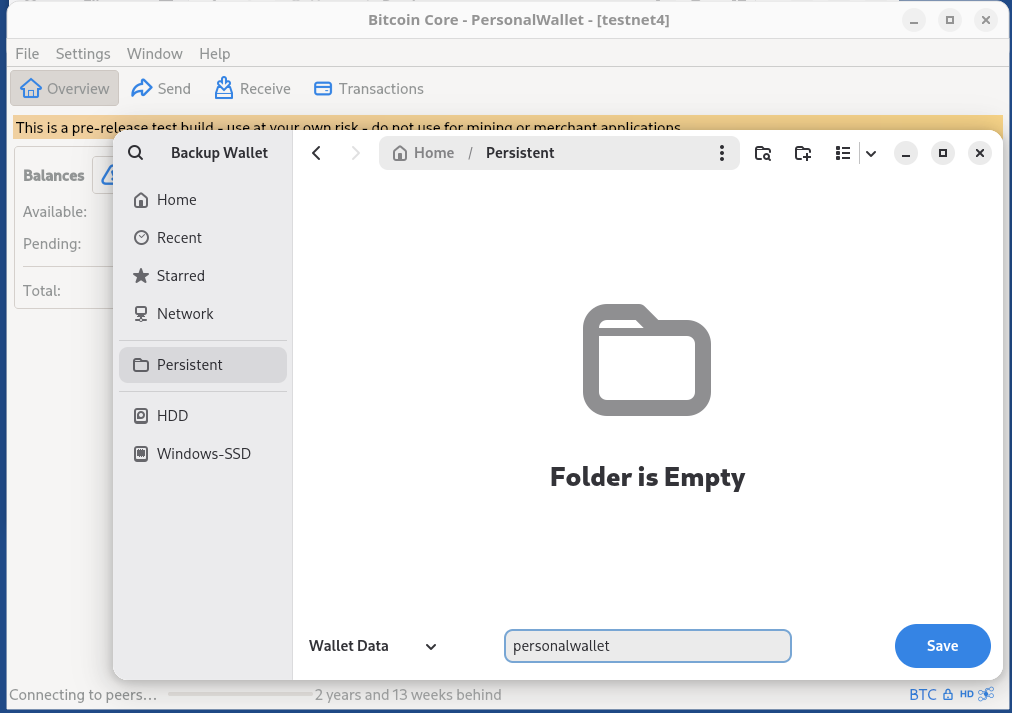
💡 These backups are complete copies of the wallet. It is recommended to store them on multiple USB drives and/or microSD cards and keep them in different physical locations. If you are concerned about security, you may also encrypt these USB drives and microSD cards. Anyone who gains access to them will be able to spend the funds. Encrypting the backups is also a privacy measure as anyone can read the xpub in clear text from any
wallet.datfile.
Step 4. Export the wallet public descriptors
Since the air-gapped computer cannot synchronize the Bitcoin node, the wallet will not be able to see how many funds we have or which transactions have been made. Therefore, the descriptors and public keys must be exported so they can be imported on the other computer.
This step is the simplest one and is exactly the same as the previous step where we created a backup of the wallet, but instead of selecting the Backup Wallet option, we select the Export WatchOnly Wallet option.
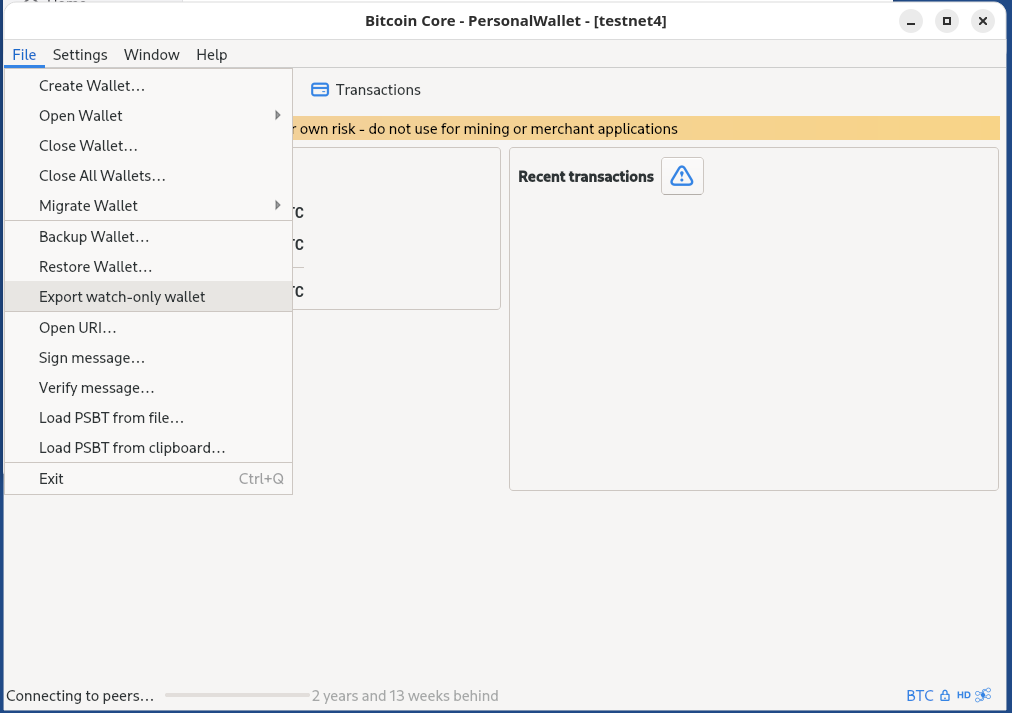
The generated .dat file must be stored in a brand new USB.
Step 5. Import the public descriptors on the Internet-connected computer
By importing the public descriptors on the computer that does have an Internet connection, we will be able to see the transaction history and the available funds.
To do so, launch the same Bitcoin-qt binary, where you will see that the synchronization does progress.
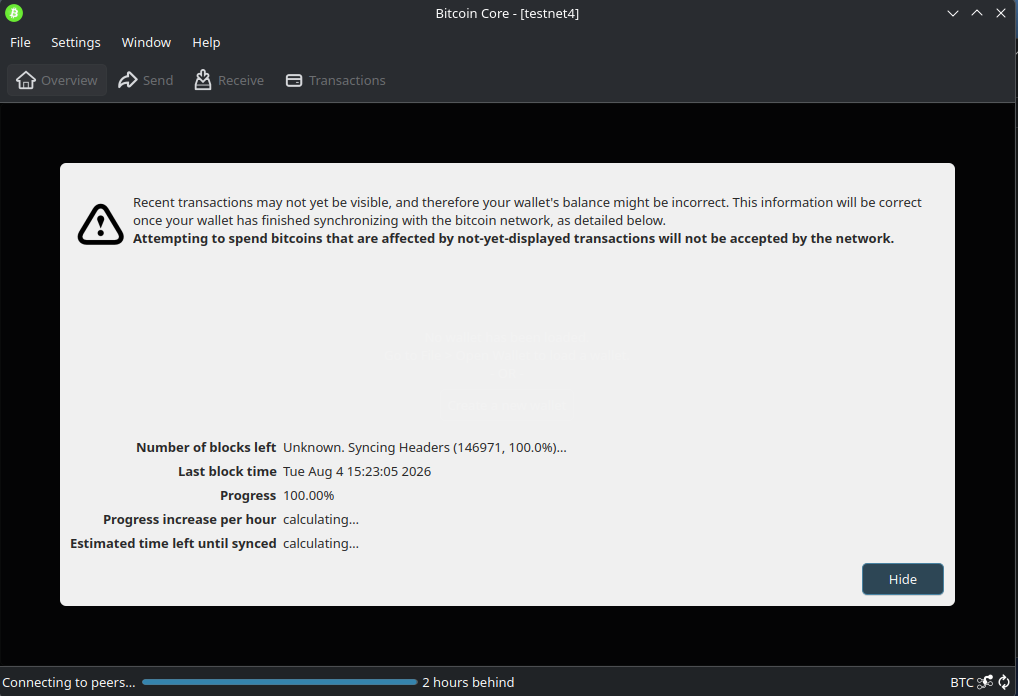
To import the descriptors, click on File and then Restore Wallet.
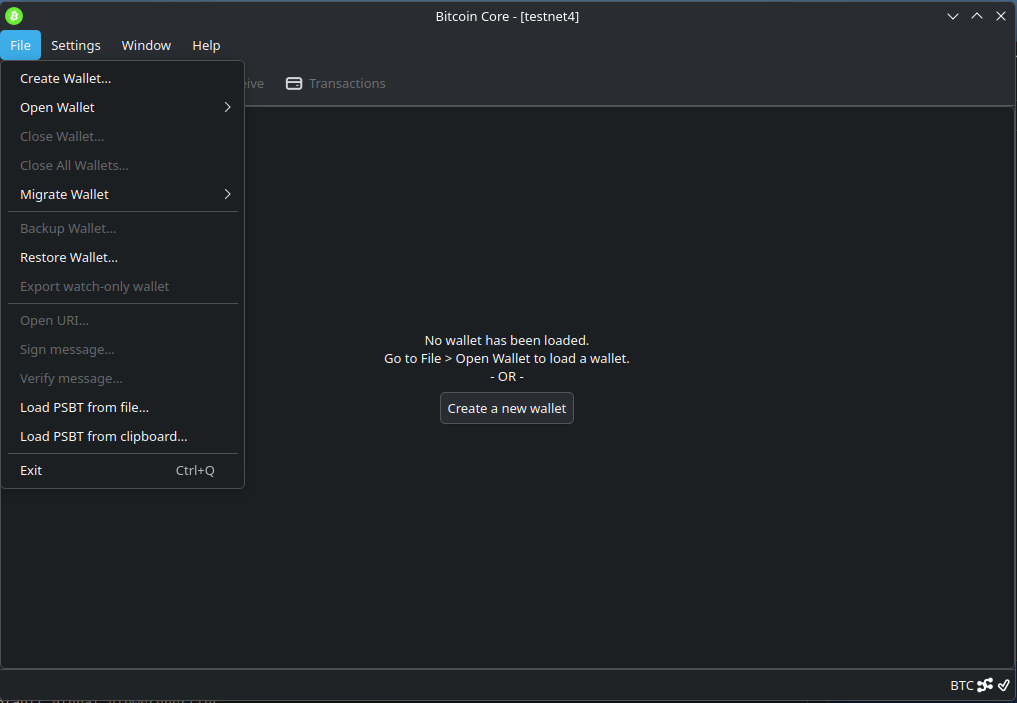
A menu will open to select the wallet file. Select the watch-only-wallet file we saved on the USB drive and open it.
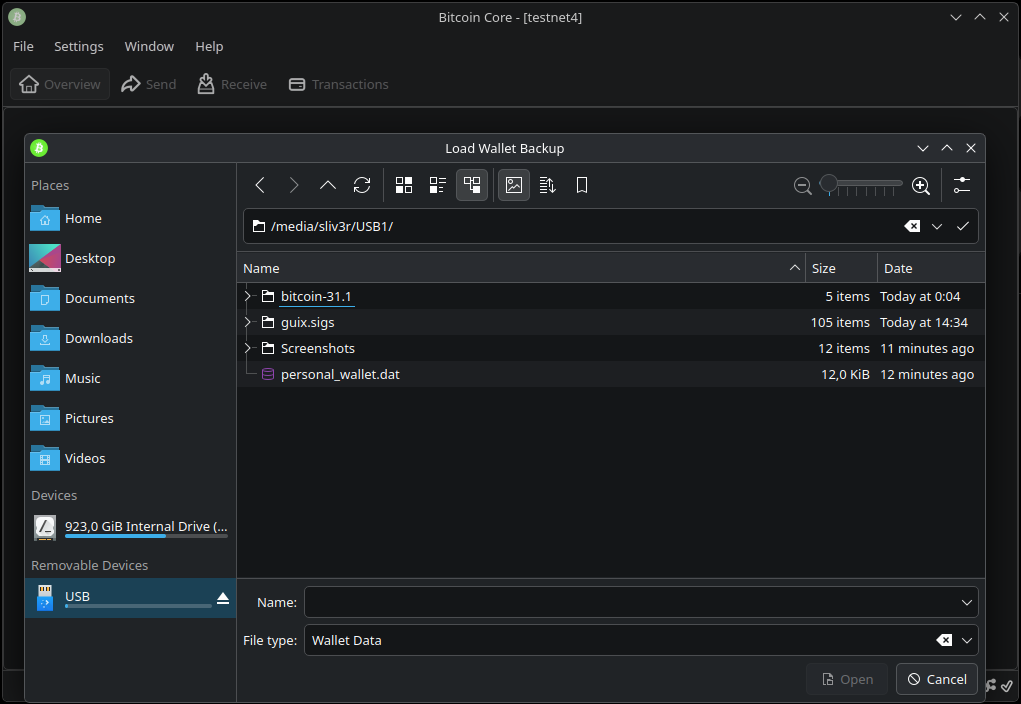
The program will ask you to enter a name, and once we accept, the wallet will be loaded.
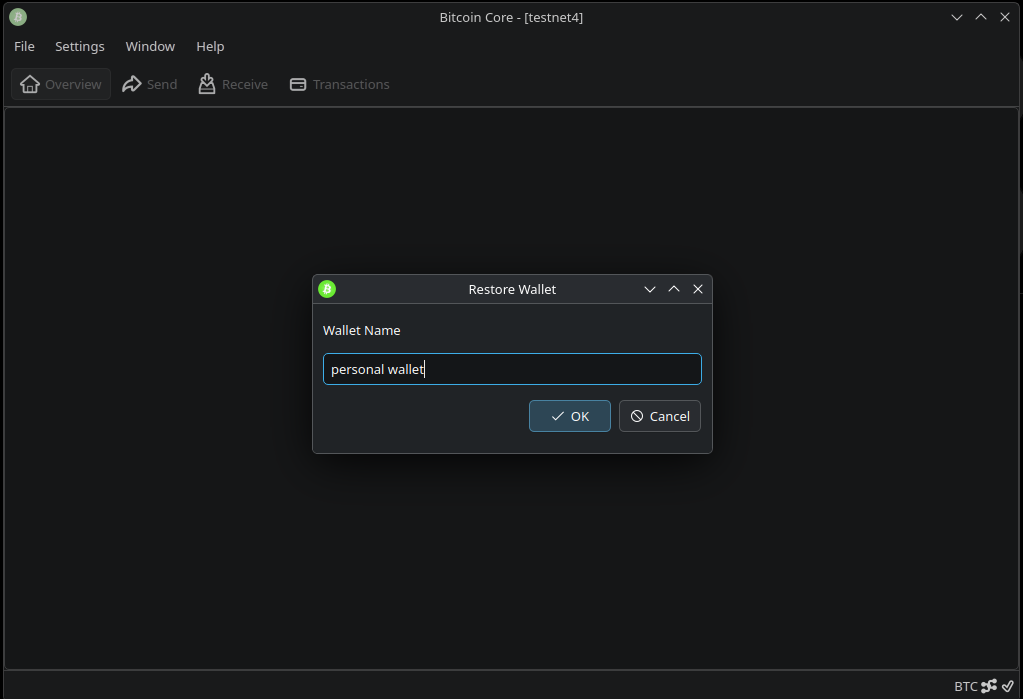
💡 Since this wallet is watch-only, it will allow us to do everything except sign transactions. In other words, it can create transactions, view incoming transactions, check the available funds, keep the accounting, etc.
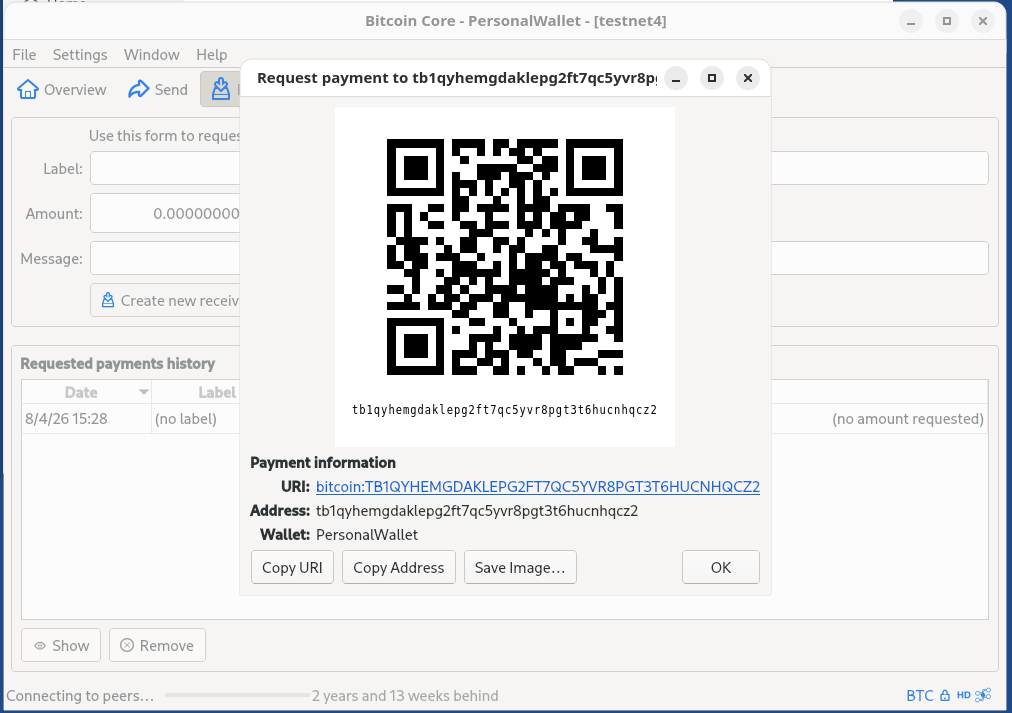
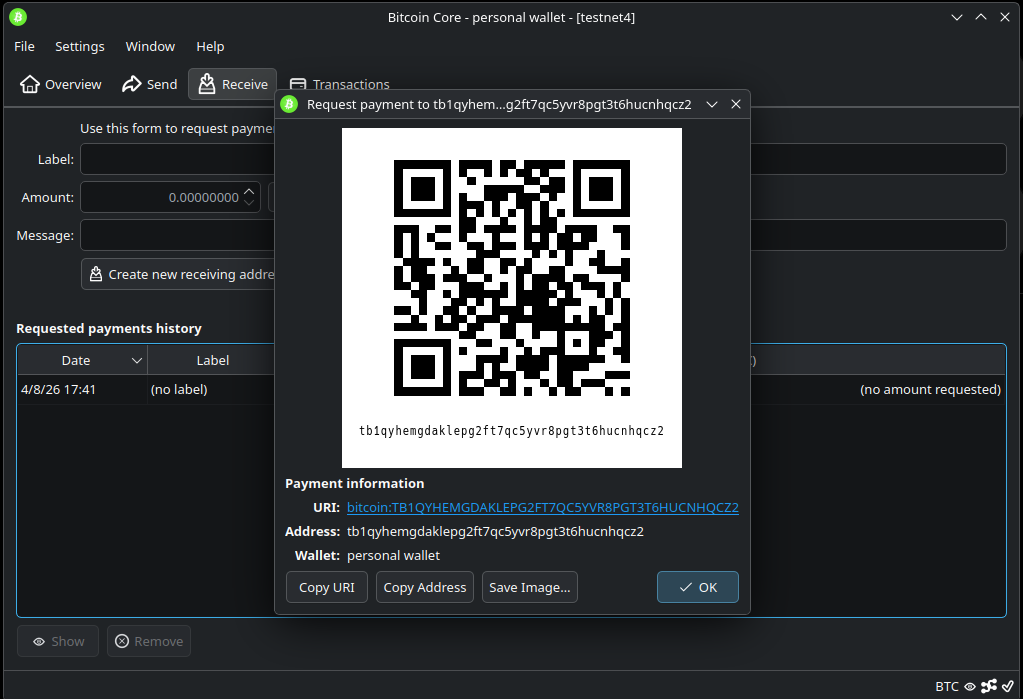
We can verify that everything is correct by generating a new address to receive funds on both computers. The addresses should match.
Step 6. Make payments with this setup
The procedure for making payments with this two-computer setup is exactly the same as if we were using a hardware wallet.
First of all, we need to create a PSBT (partially signed bitcoin transaction). To do so, from the computer with the Internet connection, click the Send button, enter the address where we want to send the funds, the amount, etc.
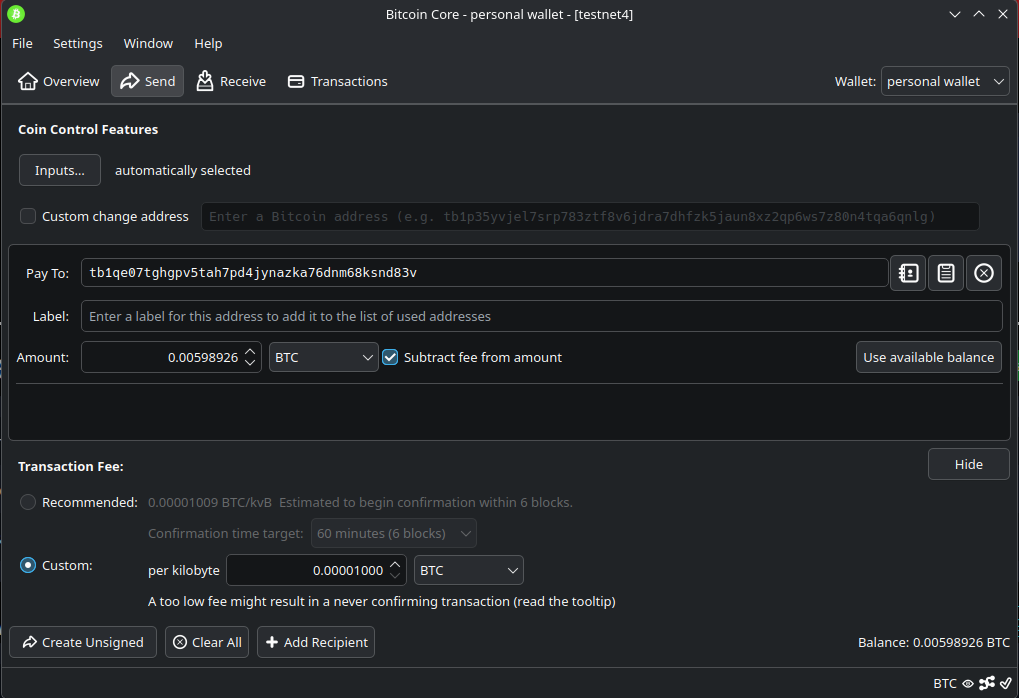
You will notice that, instead of a button to broadcast the transaction, there is a Create Unsigned button. Click on it and a confirmation screen with the details will appear.
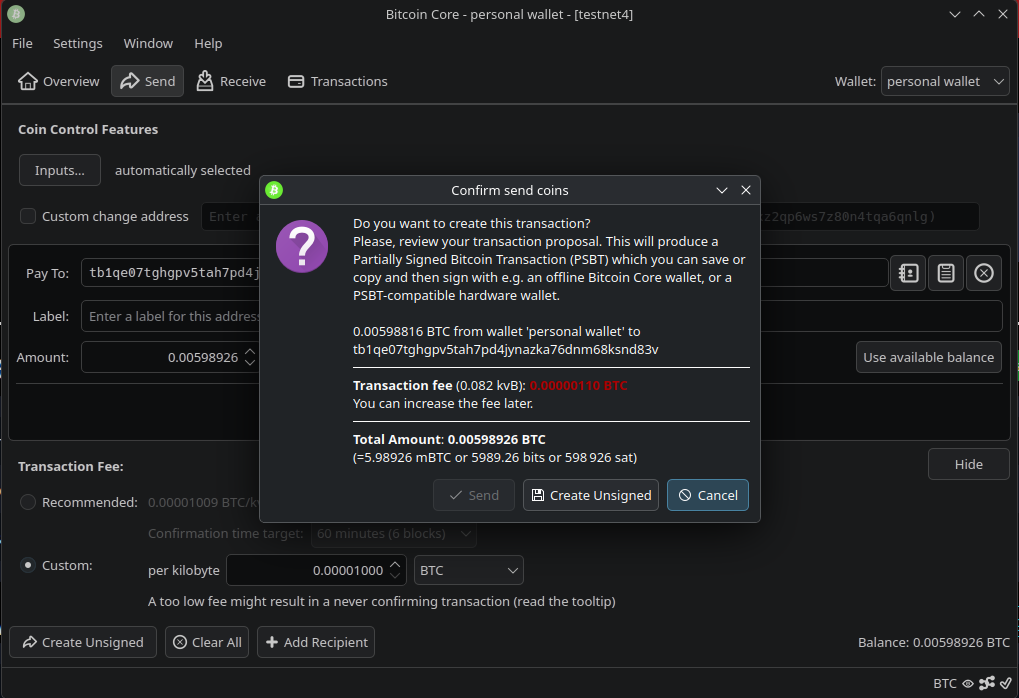
The Send button will be blocked since, obviously, we cannot send a transaction without signatures.
Click the Create Unsigned button and another small menu will open, telling us that the PSBT has been copied to the clipboard and giving us the option to save it to a file.
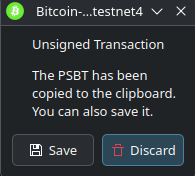
Here we have two options to transfer the transaction to the computer disconnected from the Internet.
- Option 1. Save the PSBT to a file and transfer the file using multiple brand-new microSD card or USB drive.
- Option 2. Generate a QR code from the PSBT to be scanned by the camera of the other computer.
In this guide, we will follow the second option. Since we do not want to generate the PSBT file, we can click on Discard.
⚠️ WARNING!
If you choose to use microSD or USBs make sure that all devices used are brand new, do not connect to the air-gapped computer any USB or microSD that has been previously connected to an online device as it could contain malware and try to expose your wallet file and private keys.
You can use any program you trust to create the QR code. If you are on Linux and feel a bit comfortable with it, you can use the terminal with the command:
echo PSBT | qr
You must replace PSBT with the PSBT that Bitcoin Core has copied for you. This command will return a QR code.
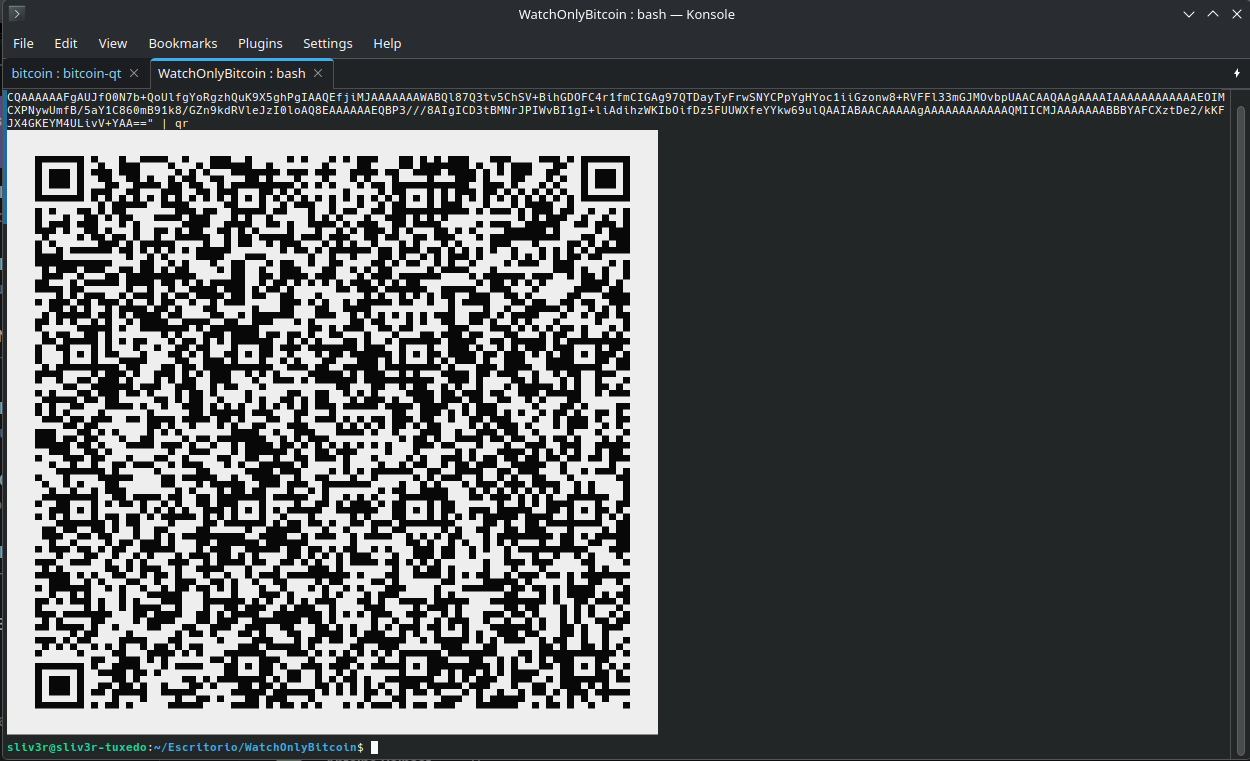
Next, from the air-gapped computer, you need to scan the QR code. Again, you can use any program.
⚠️ WARNING!
Keep in mind that if you need to install a specific program, you should install it before creating the wallet, so that in case you install malware, it cannot leak the wallet’s private keys.
In this case, I use zbarcam from the terminal. When it finds a QR code, it reads it and prints the text to the terminal.
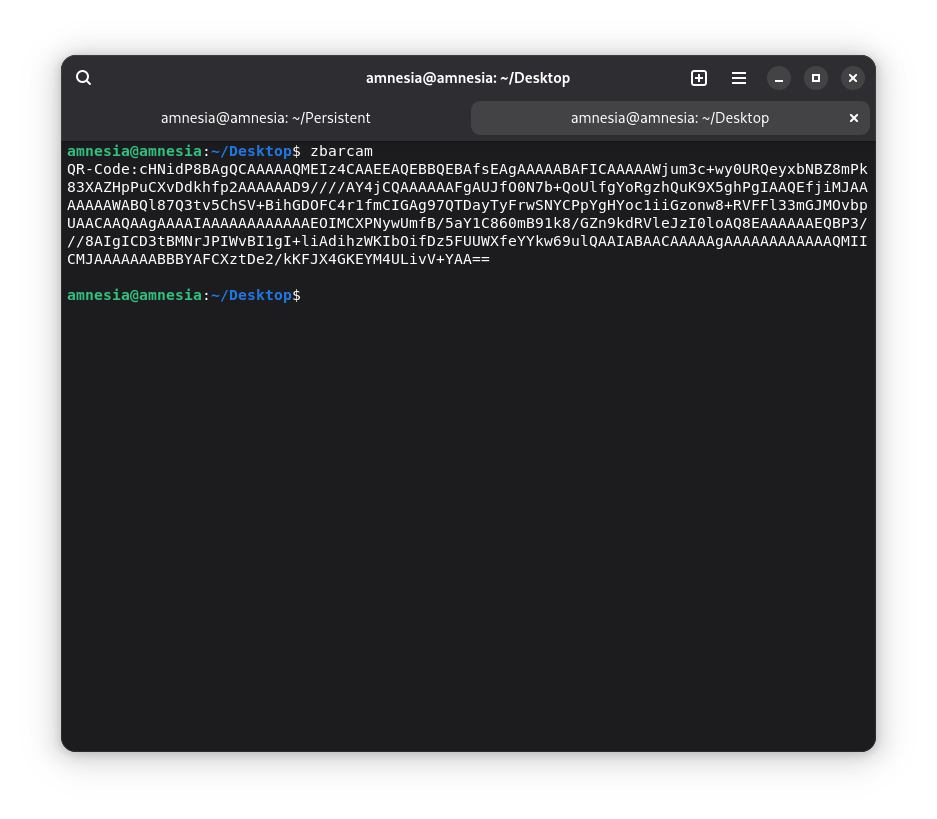
As you can verify, the value it prints is the PSBT that was created previously.
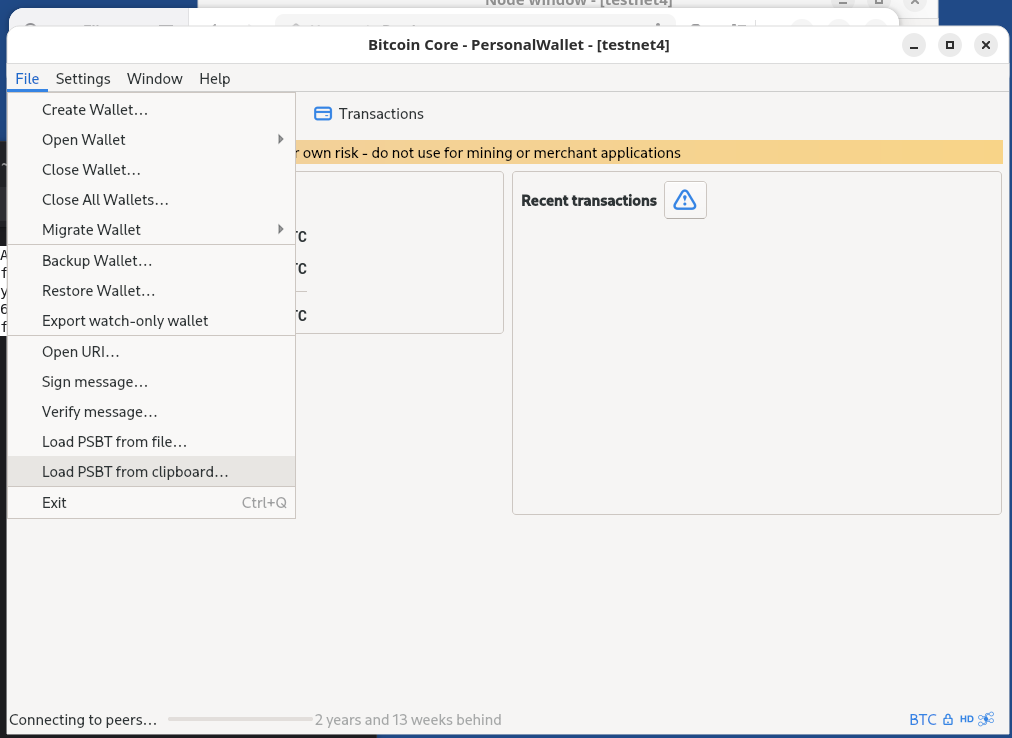
To sign it, open the wallet in Bitcoin Core and go to File and then Load PSBT from clipboard. If you used a USB drive or a microSD card, you should use the Load PSBT from file option instead.
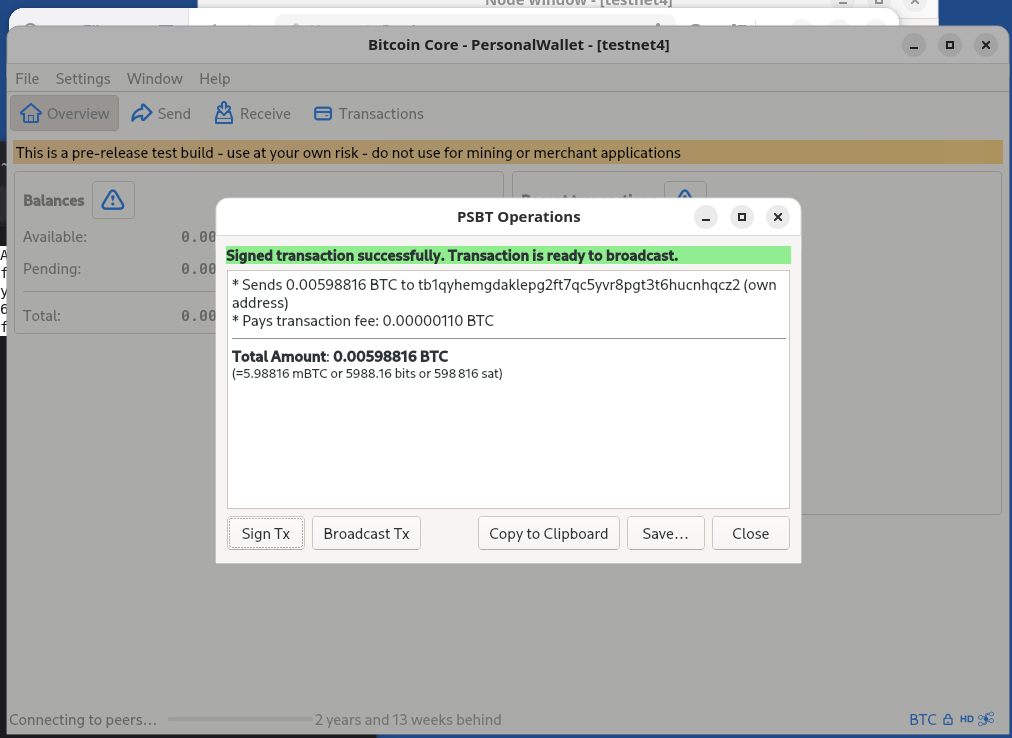
Once the PSBT is loaded, a menu to sign the PSBT will appear. Click on Sign Tx and then on Copy to Clipboard. You can click on Save if you want to use a USB drive or microSD card to copy the transaction to the other computer.
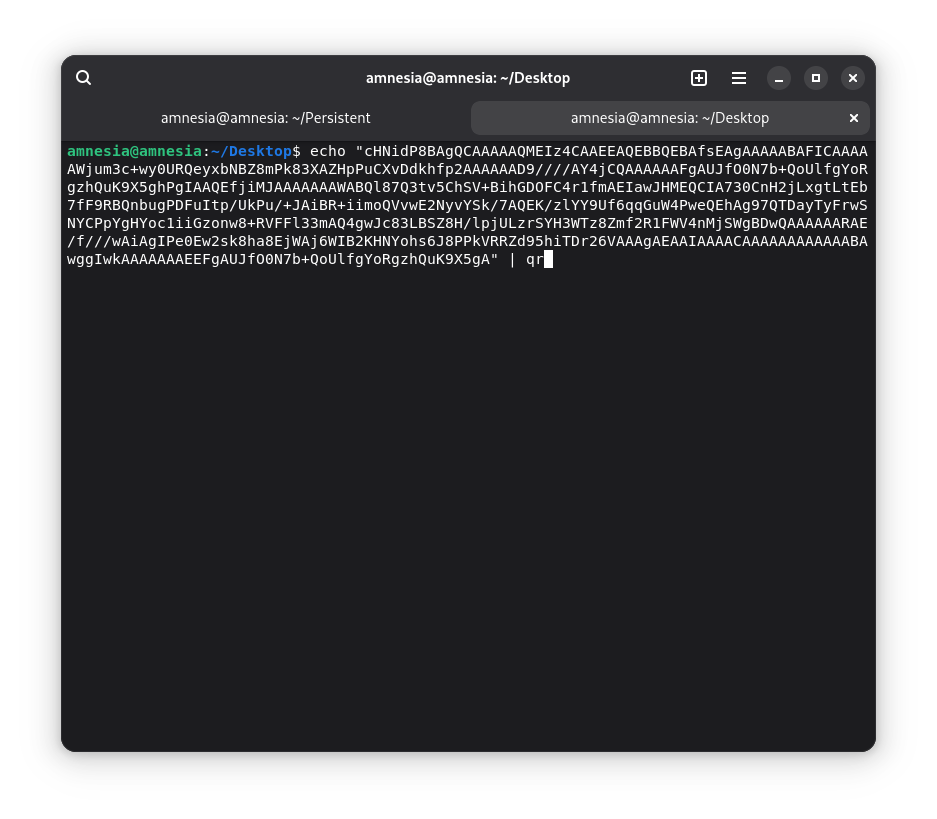
If you want to use QR codes, we can use the command again:
echo Tx | qr
This time, replacing Tx with the copied value.
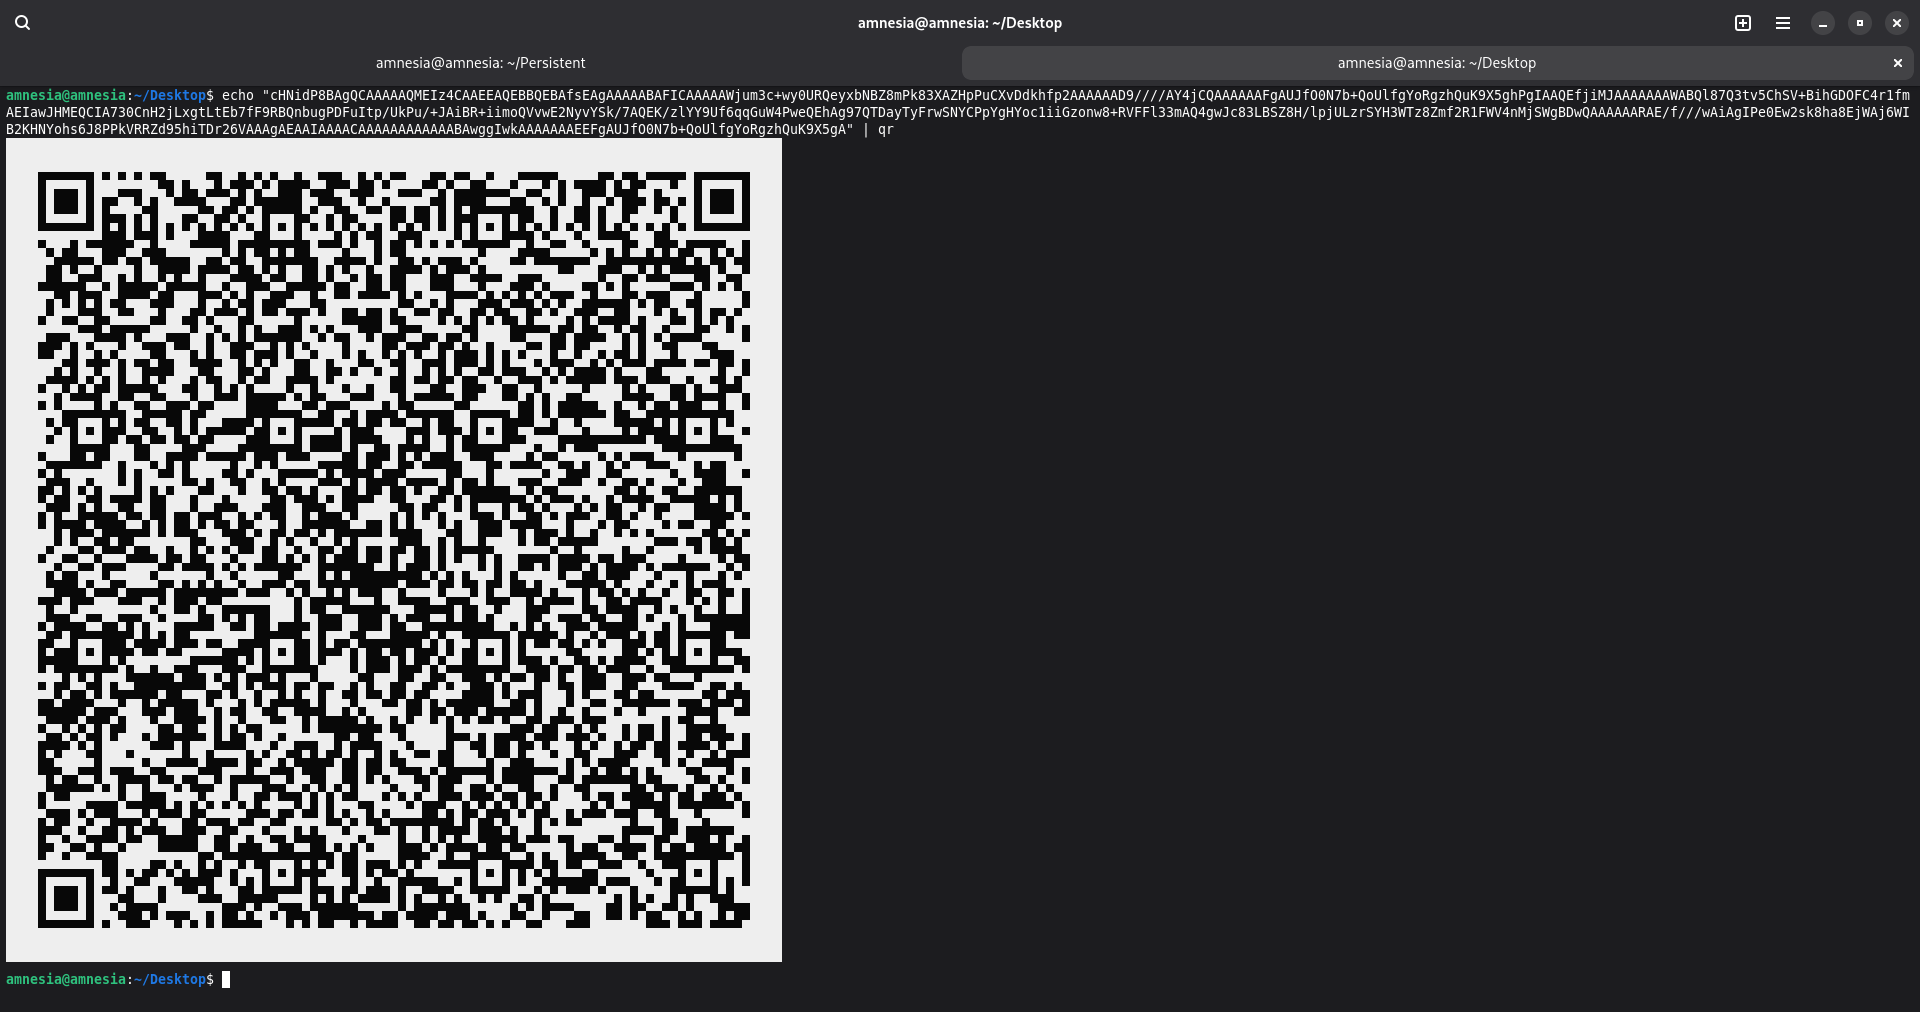
From the Internet-connected computer, we can scan the QR code in the same way as before.

From Bitcoin Core, once again, open the PSBT by clicking on File and then Load PSBT from clipboard.
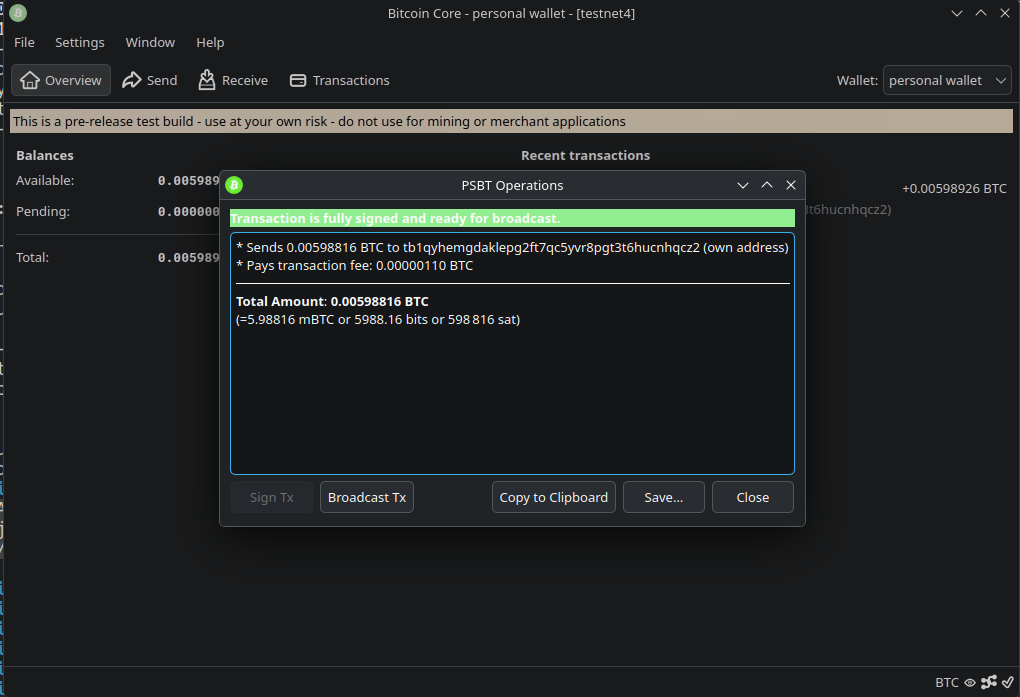
Next, click on Broadcast Tx and we will see the white letters on a green background saying that the transaction has been sent correctly.
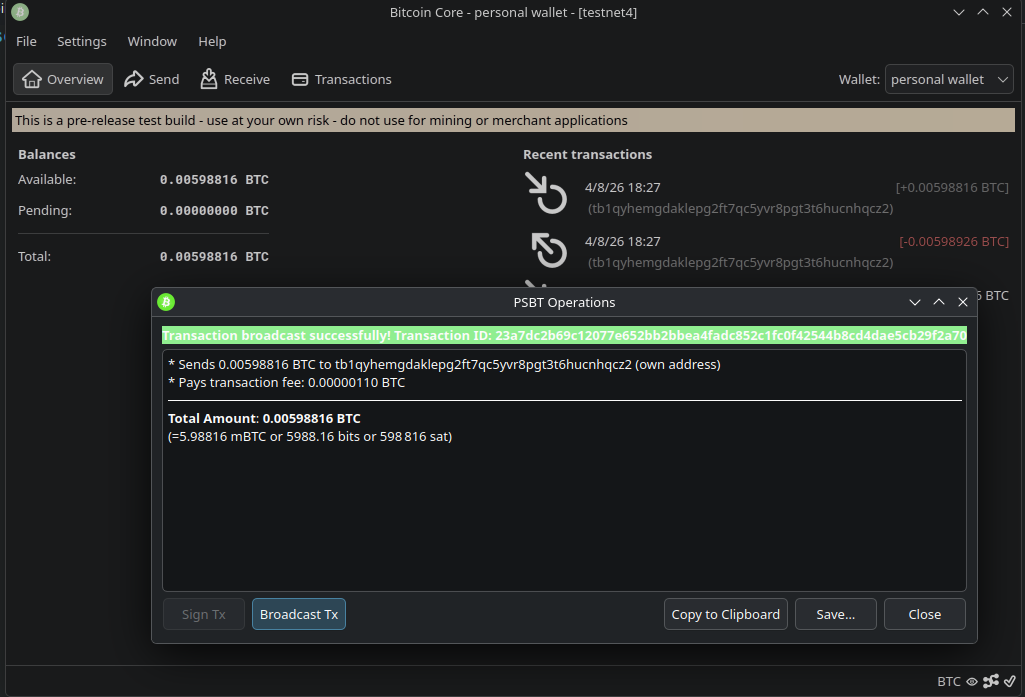
With this, the guide concludes. To keep making payments, simply repeat step 6. To receive payments, from the Internet-connected computer, you can click on the receive tab to generate new addresses.
The following section is an extra section of the guide that explains how we can make physical backups of the wallet. If you are not interested in making physical backups, you can stop reading here.
Extra Section - Physical backups
In the previous steps, only digital backups have been made, storing copies of the wallet on several USB drives or microSD cards, but maybe we want to have some physical or paper backups.
Bitcoin Core does not implement BIP39, so we cannot simply write down the 12 or 24 words and be done. What we need to do is store the descriptor with the private key (xprv).
To do so, we will open the Bitcoin Core console from the air-gapped computer. And we will unlock the wallet with the command
walletpassphrase PASSPHRASE 60
Replacing PASSPHRASE with the password chosen in step 3.
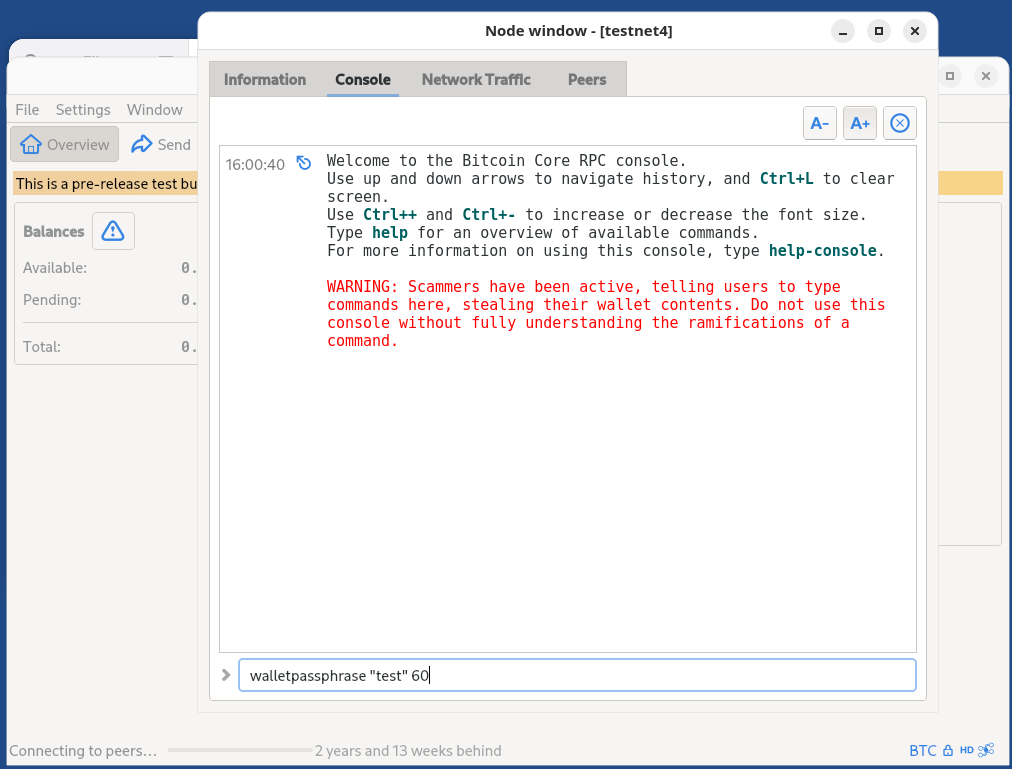
Next, we list the descriptors with
listdescriptors true
The true value indicates that the private descriptors should be listed.
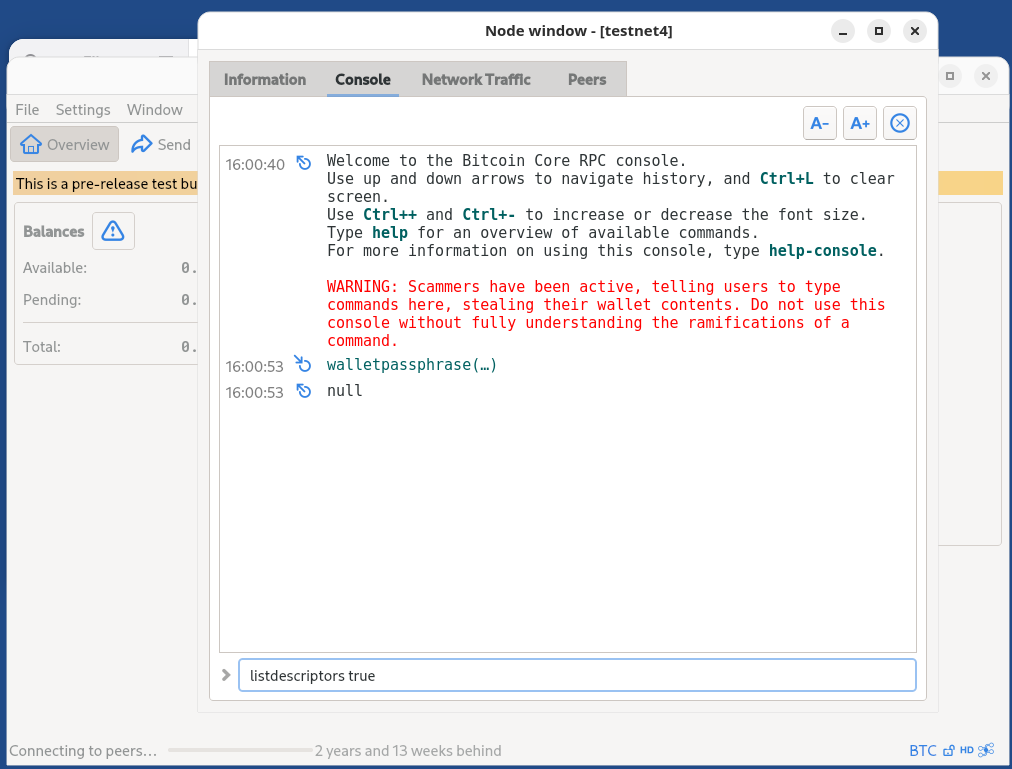
This returns a list with the descriptors. We need to look for the value that starts with xprv in one of them and copy it.
💡 In the image, you can see that it starts with
tprvbecause testnet was used.
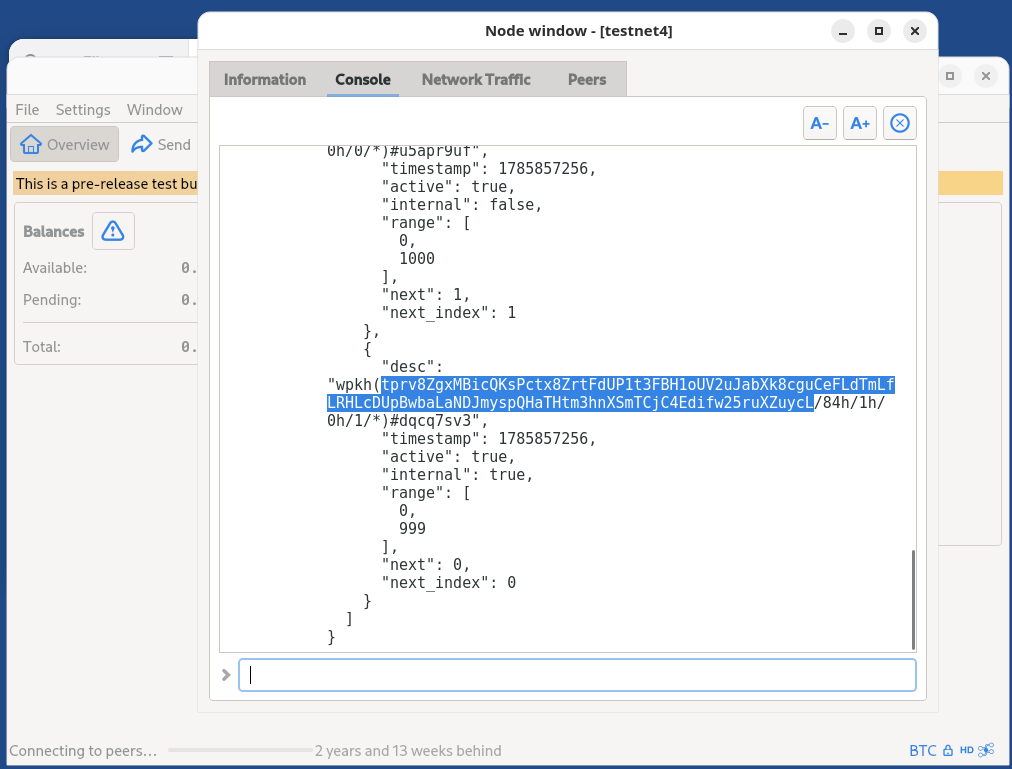
This value can be written down on paper and will be enough to recover the wallet.
💡 If the descriptors were created manually using custom derivation paths, the entire descriptor along with the derivation path should be copied. In this case, since we used the default one, we can trust that Bitcoin Core will keep the standard derivation paths, so there is no need to write them down.
Another way to make the backup is to store the xprv in a QR code. To do so, we can use the same tools as in step 6 to encode the PSBT into a QR.
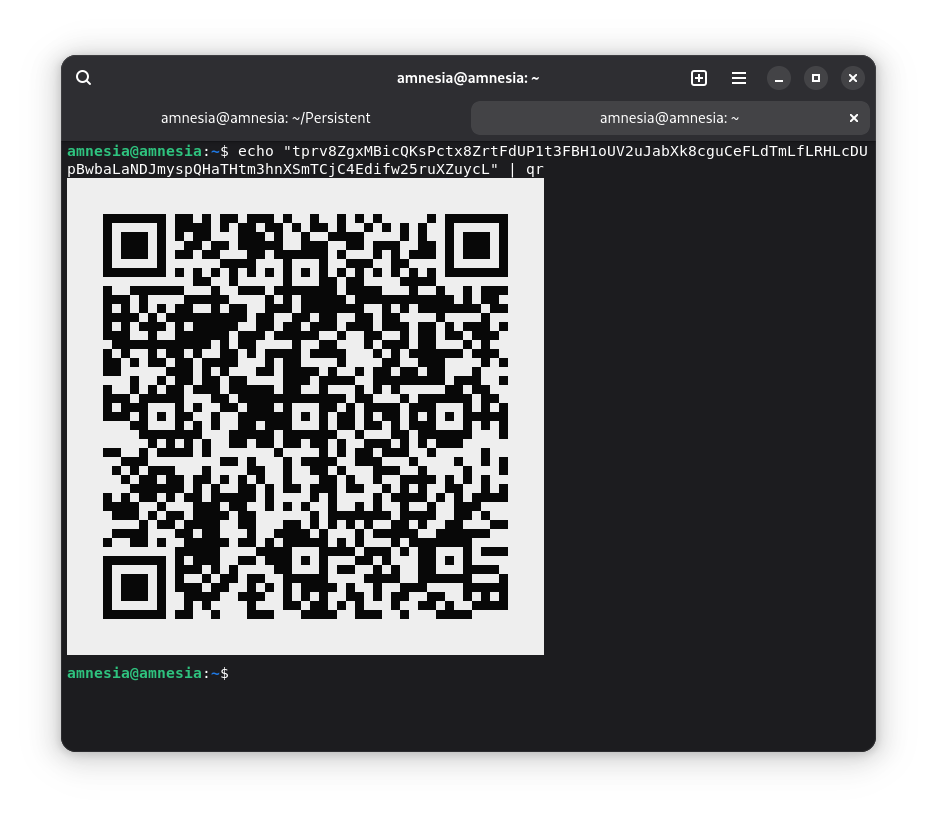
Printing the QR code is not a good idea since we do not want any other device to ever see it. One option is to place a piece of paper over the screen and trace the QR code. Once you have it on paper, you can try scanning it from the air-gapped device to see if it can read it correctly. I would personally recommend having multiple backups with different formats, while a QR is a good option, also writing by hand the whole xprv is a good complement.